Appwrite makes it a snap to add authentication to our Vue apps, including managing user data, all without writing or maintaining backend code.
Appwrite is an open-source backend-as-a-service platform for creating web, mobile and flutter applications. With Appwrite authentication services, we can authenticate, confirm and manage users using different sign-in methods. Aside from that, we can also protect user data using Appwrite API.
This article will explain Appwrite, its benefits as a backend platform, and how we can authenticate and manage user data in our application without writing or maintaining our backend code from scratch.
Prerequisites
To understand this article better, there are certain things we must know and set up:
- Docker installed on our computer; if you don’t have it installed, you can checkout the Docker documentation for a guide on how to install it
- Node.Js installed with a compatible version
- Prior knowledge of working with forms and Vue
- Kendo UI for Vue installed in our Vue project
- If you don’t have a functioning Appwrite instance, you can follow this article to create one
The following is what we will cover in this article:
- What is Appwrite?
- Features and Benefits of Using Appwrite
- Create a New Vue Project
- Create a New Appwrite Project
- Add Appwrite to the Project
- Building our Authentication Form with Kendo UI for Vue
- Authenticate Users with Appwrite API
- Conclusion
What is Appwrite?
Appwrite is a backend-as-a-service platform that helps us to create mobile, web and flutter applications. It is open-source and self-hosted, providing us with all the core APIs we need to create our application. It has good services that can help in speeding our development.
Features and Benefits of Using Appwrite
- Appwrite gives us access to easily store, query and manage our application documents. It also supports multiple file storage providers.
- With Appwrite console, we can track our backend API usage and manage our project resources from a modern UI.
- Appwrite provides us with various security features such as HTTPS, secure data storage and automatic encryption of our sensitive data.
- Appwrite supports multiple database types, which include MySQL, MongoDB, Redis, etc. This external database makes it easier for us to select the right database that will fit our application needs.
Create a New Vue Project
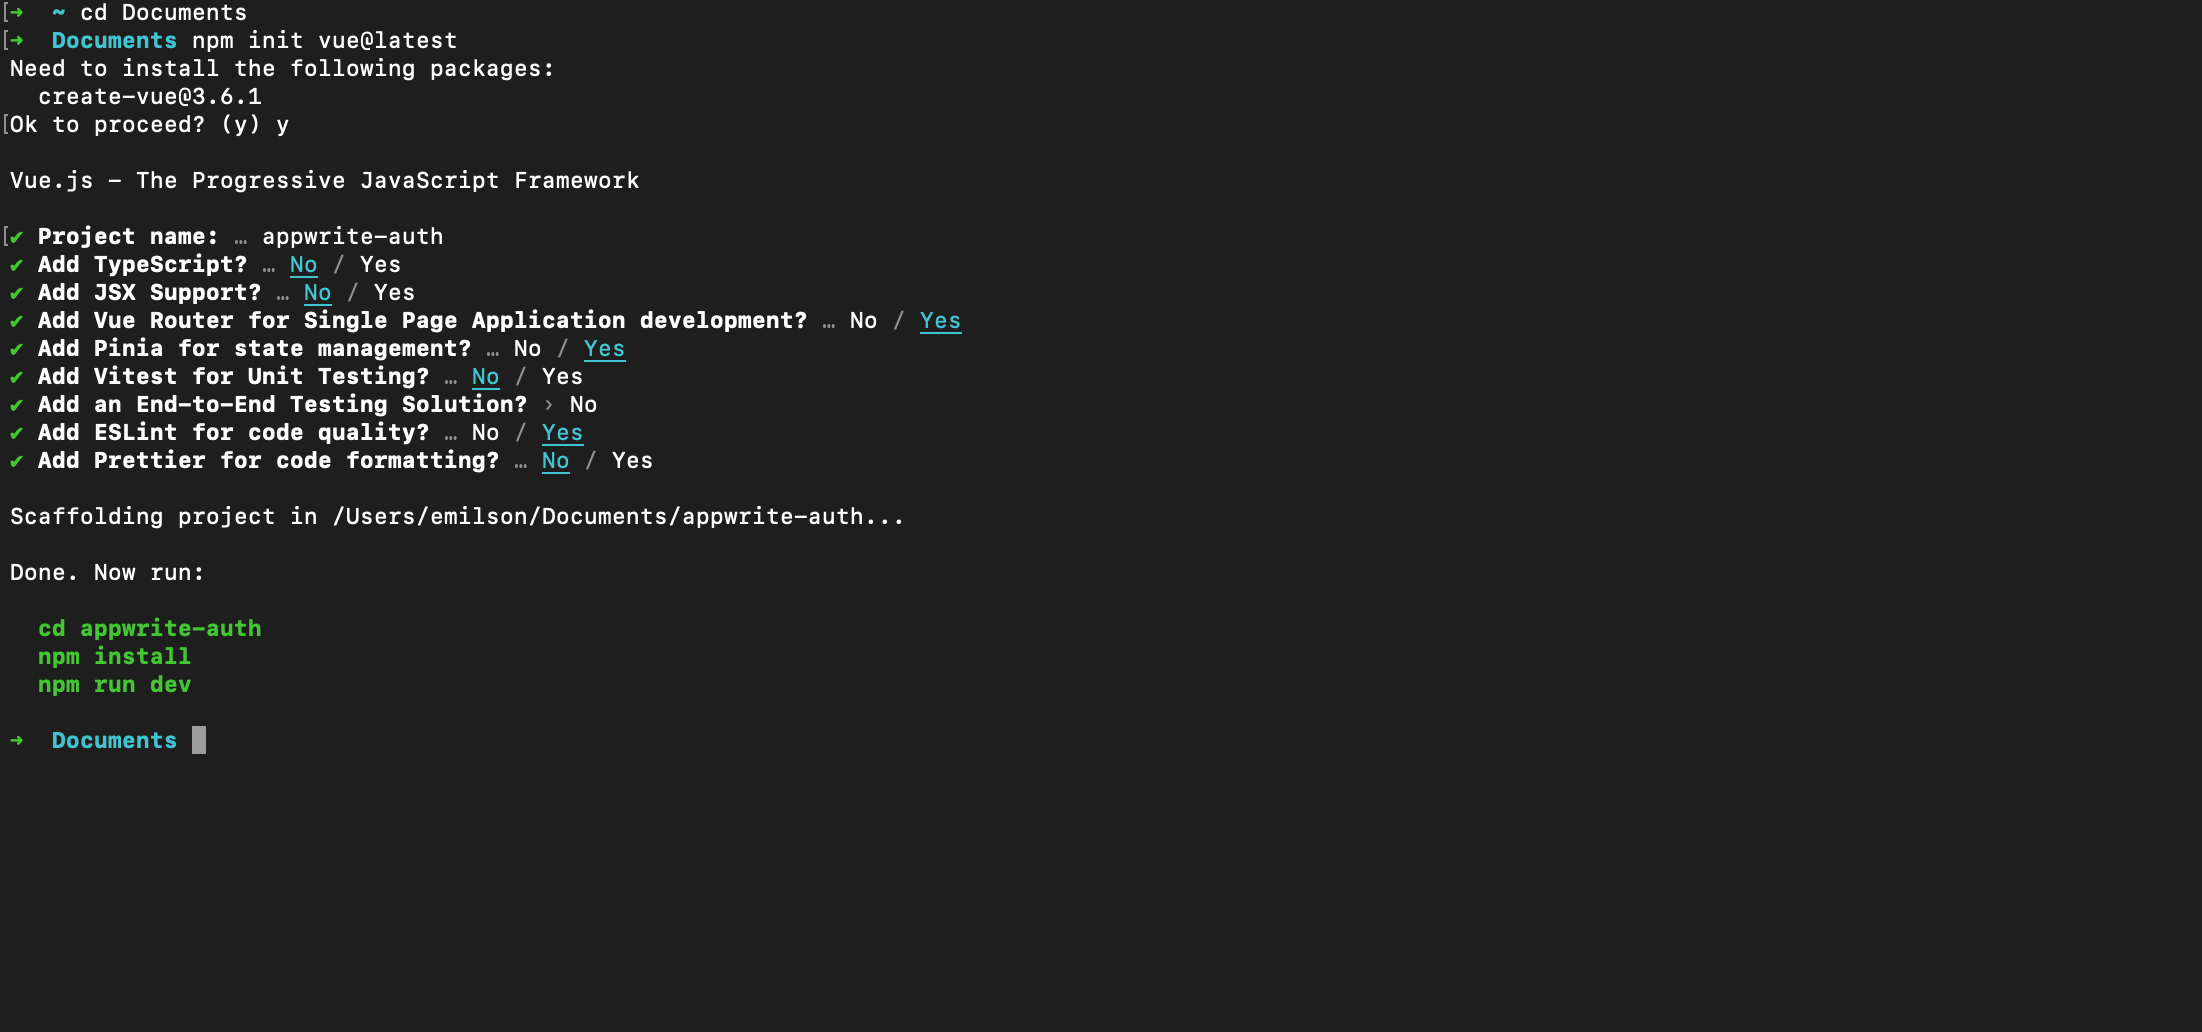
We will utilize the official Vue project scaffolding tool create-vue to start a new project since it is the most recent Vue project. This command facilitates the creation of Vue projects by giving us excellent optional features from which to choose. To create a new project, we will cd into the directory and run the command below:
npm init vue@latest
After running the previous command, we will receive a prompt message with the features we wish to add to our project. The things we want will be selected, and the ones we don’t will be left out. See an illustration below:
Create a New Appwrite Project
Appwrite is a free tool that is easy to set up and offers helpful starting tutorials. Before starting a new Appwrite project, we must have Docker installed and an Appwrite local instance set up in accordance with the prerequisites.
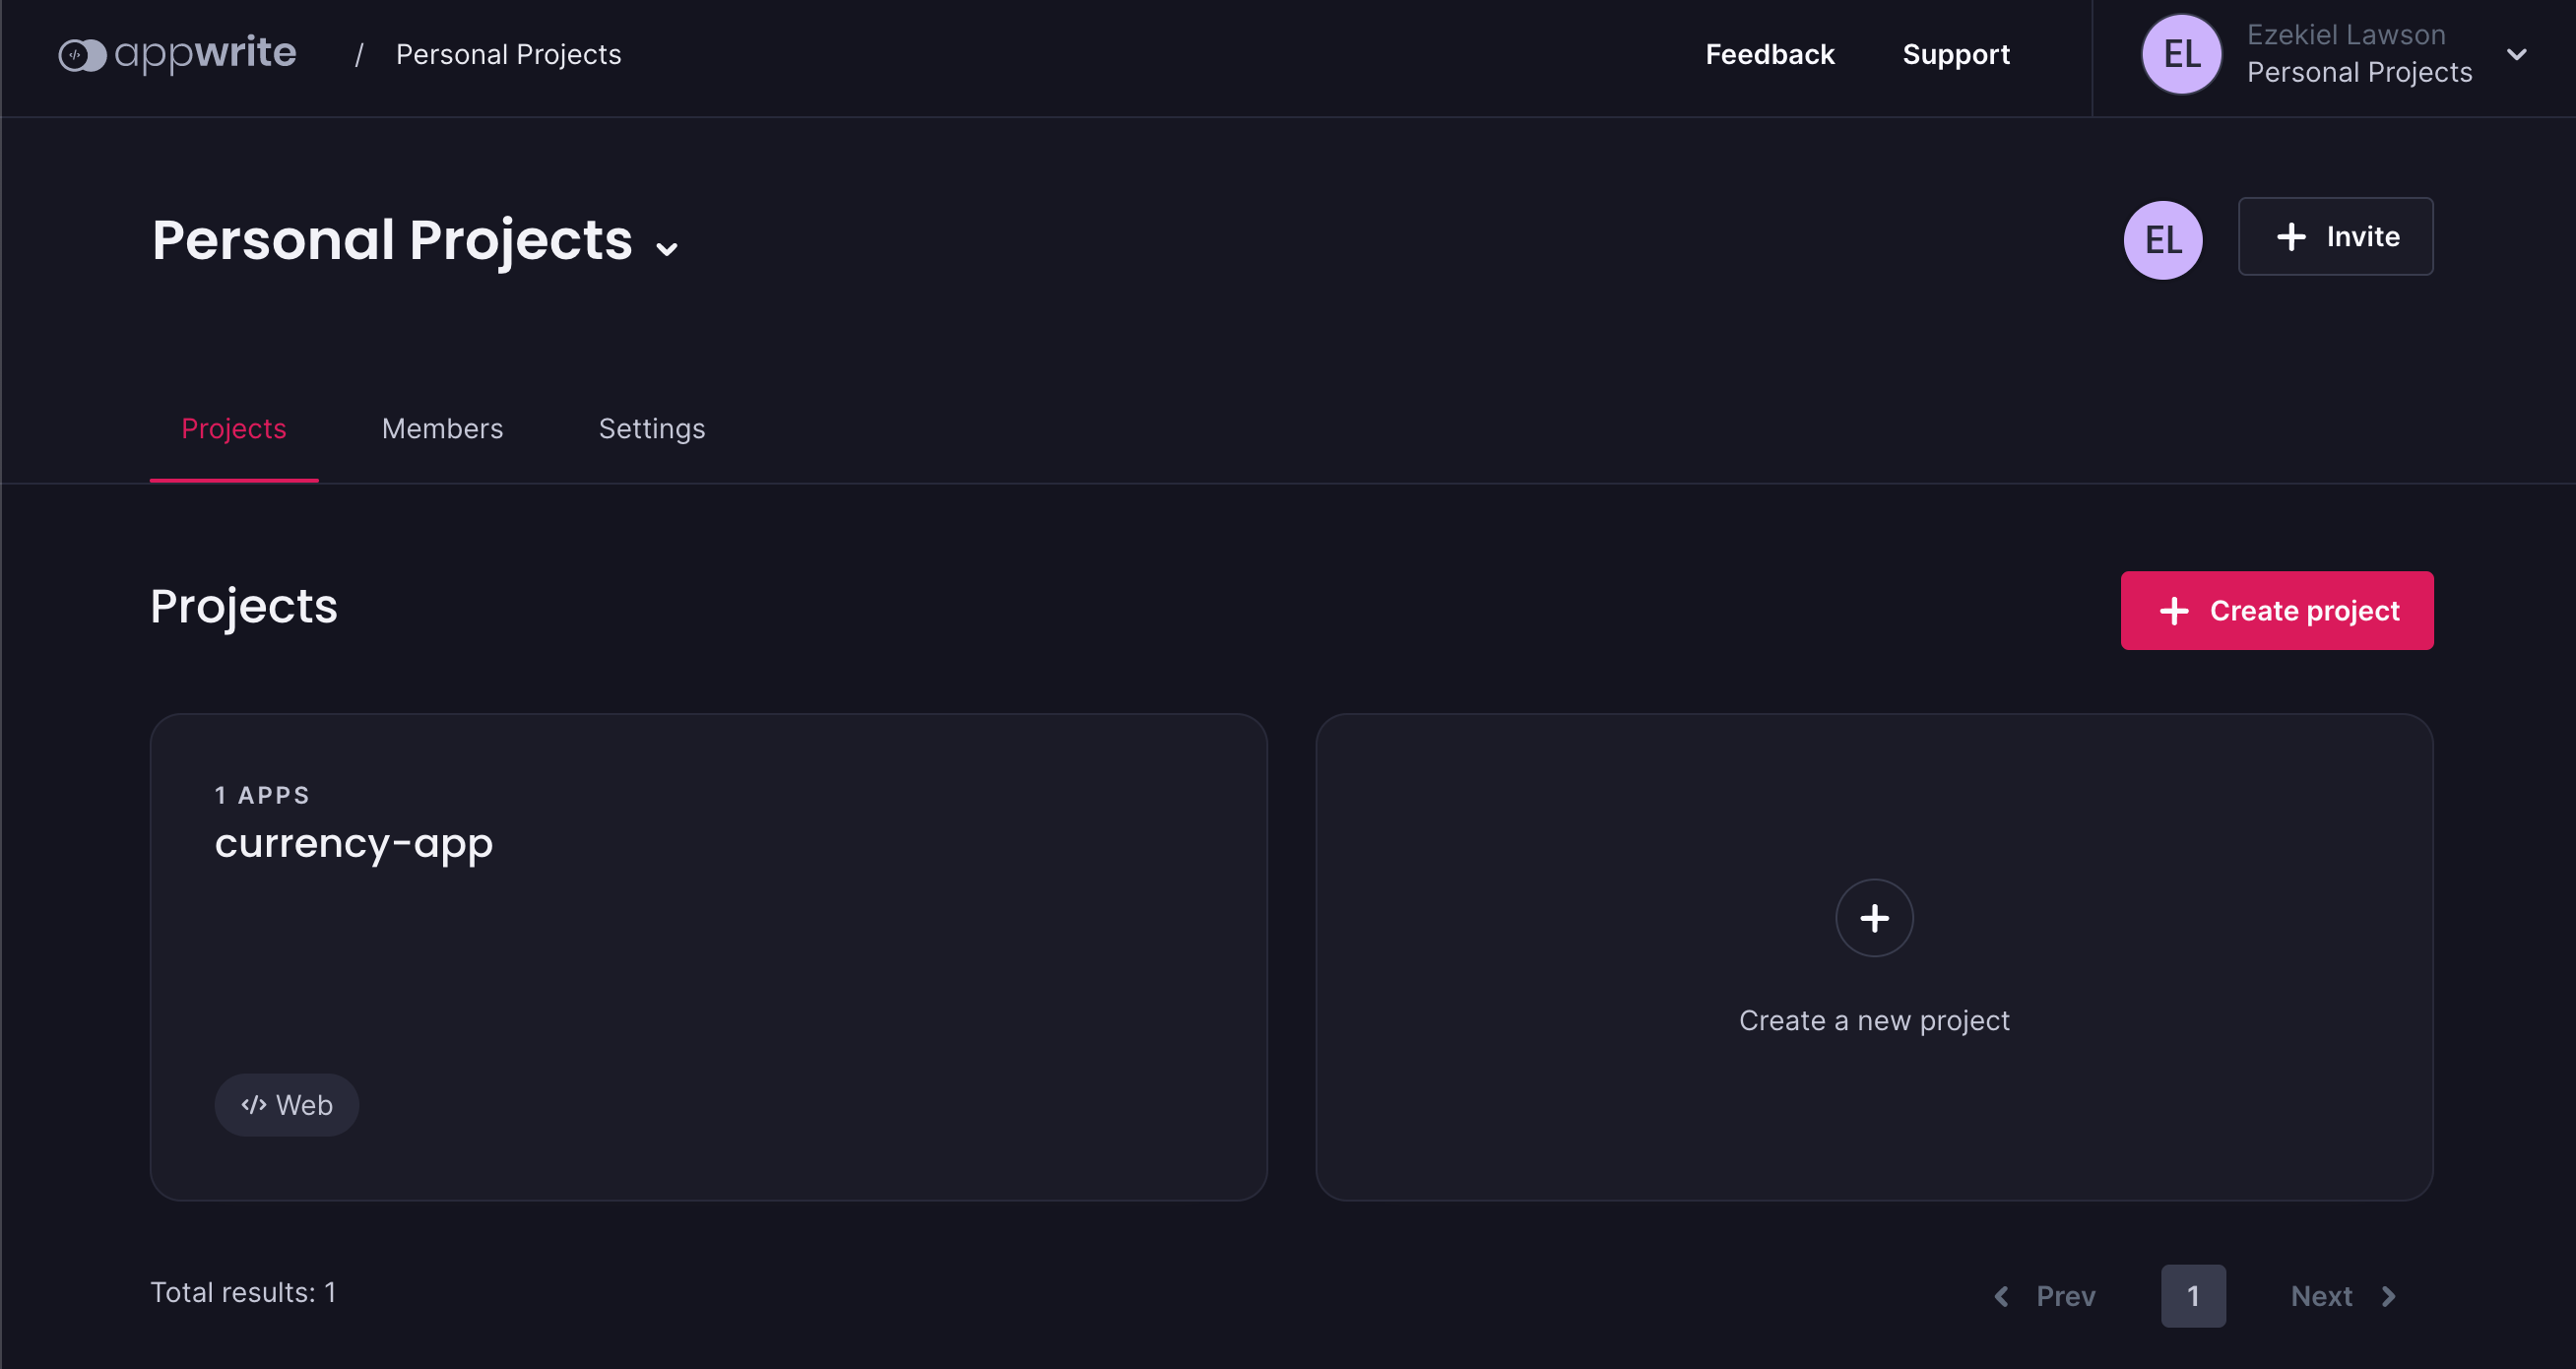
We entered our hostname and port information while building our Appwrite instance. Localhost:80 is the default setting, but we can change it if we’d like. To access our Appwrite console, we go to the chosen port, register an account there, and then return. See an illustration of our Appwrite console.
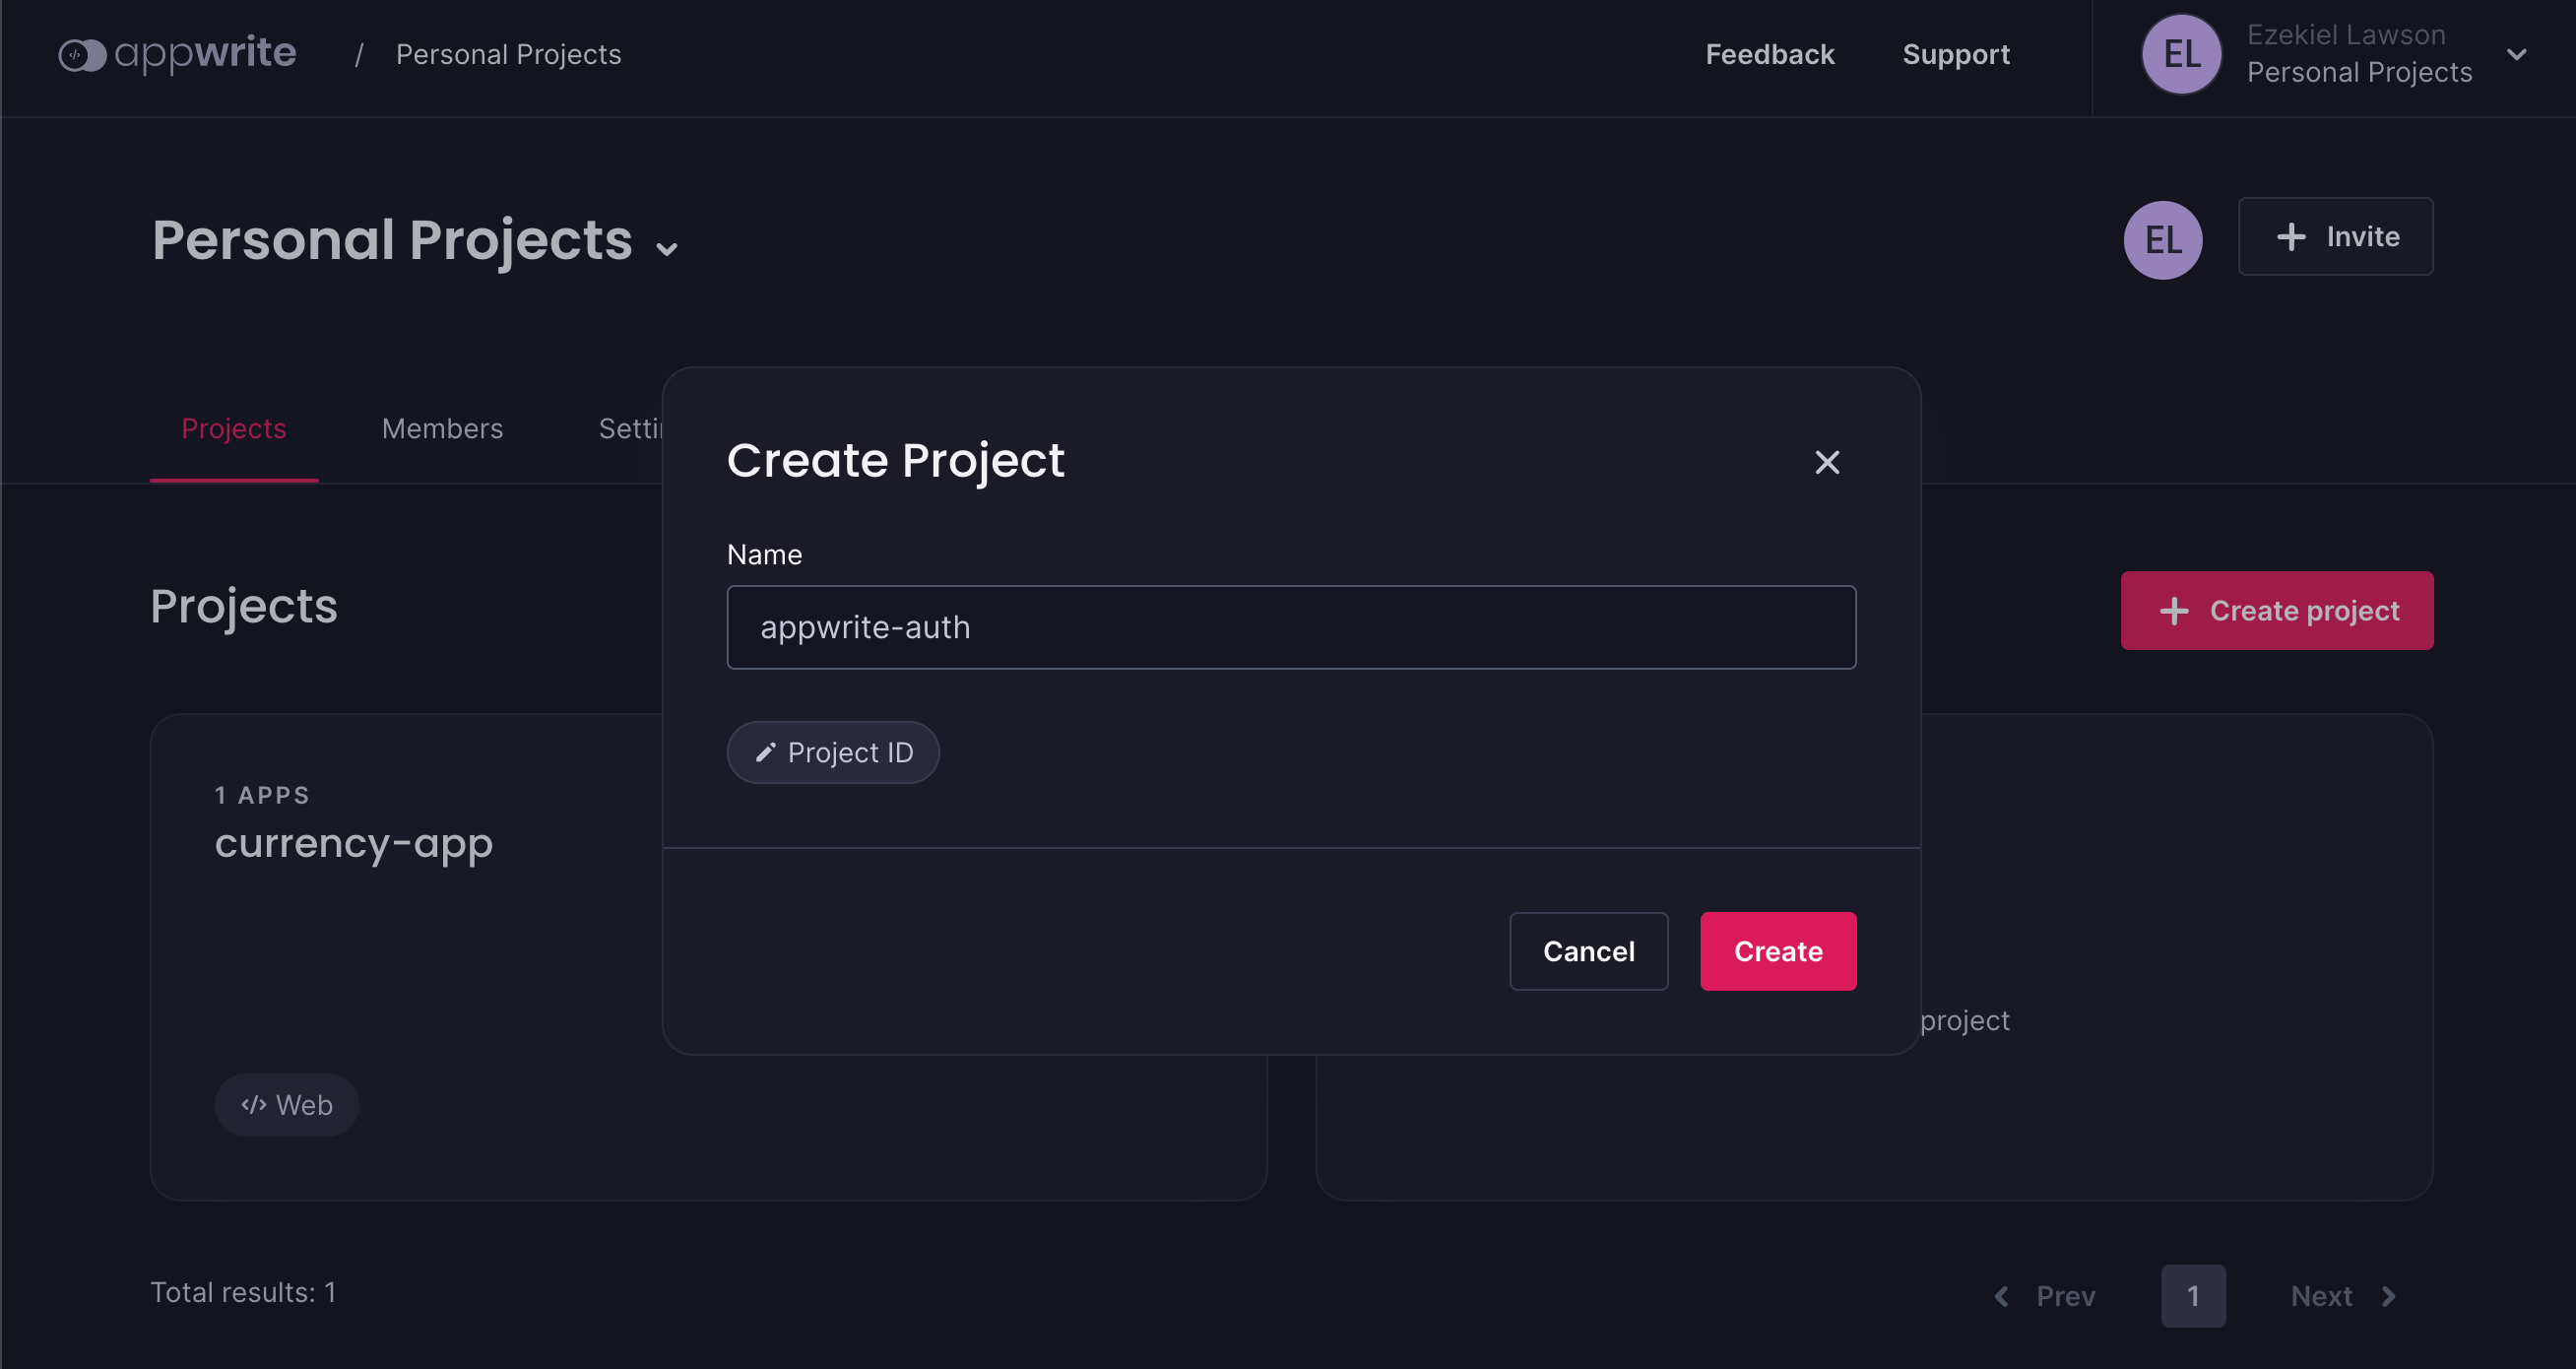
To create a new project, click create project button and add a project name. In this example we create a project name appwrite-auth and click on the create button.
Next, we will add a platform. With Appwrite SDKs, we can easily add any platform we want. In this section, we have options for: web App, Flutter App, Apple App and Android App. Select the Web App platform, as that’s the platform we are building for.

Next, we will select a name and hostname to register our web app.

Once we are done registering our web app, next we will install and set up our SDK in our Vue project.
Add Appwrite to the Project
To add Appwrite to our Vue project, we will install it with the command below:
npm install appwrite
After installing Appwrite, we will import the Appwrite module into our project using the syntax below:
import { Client } from 'appwrite';
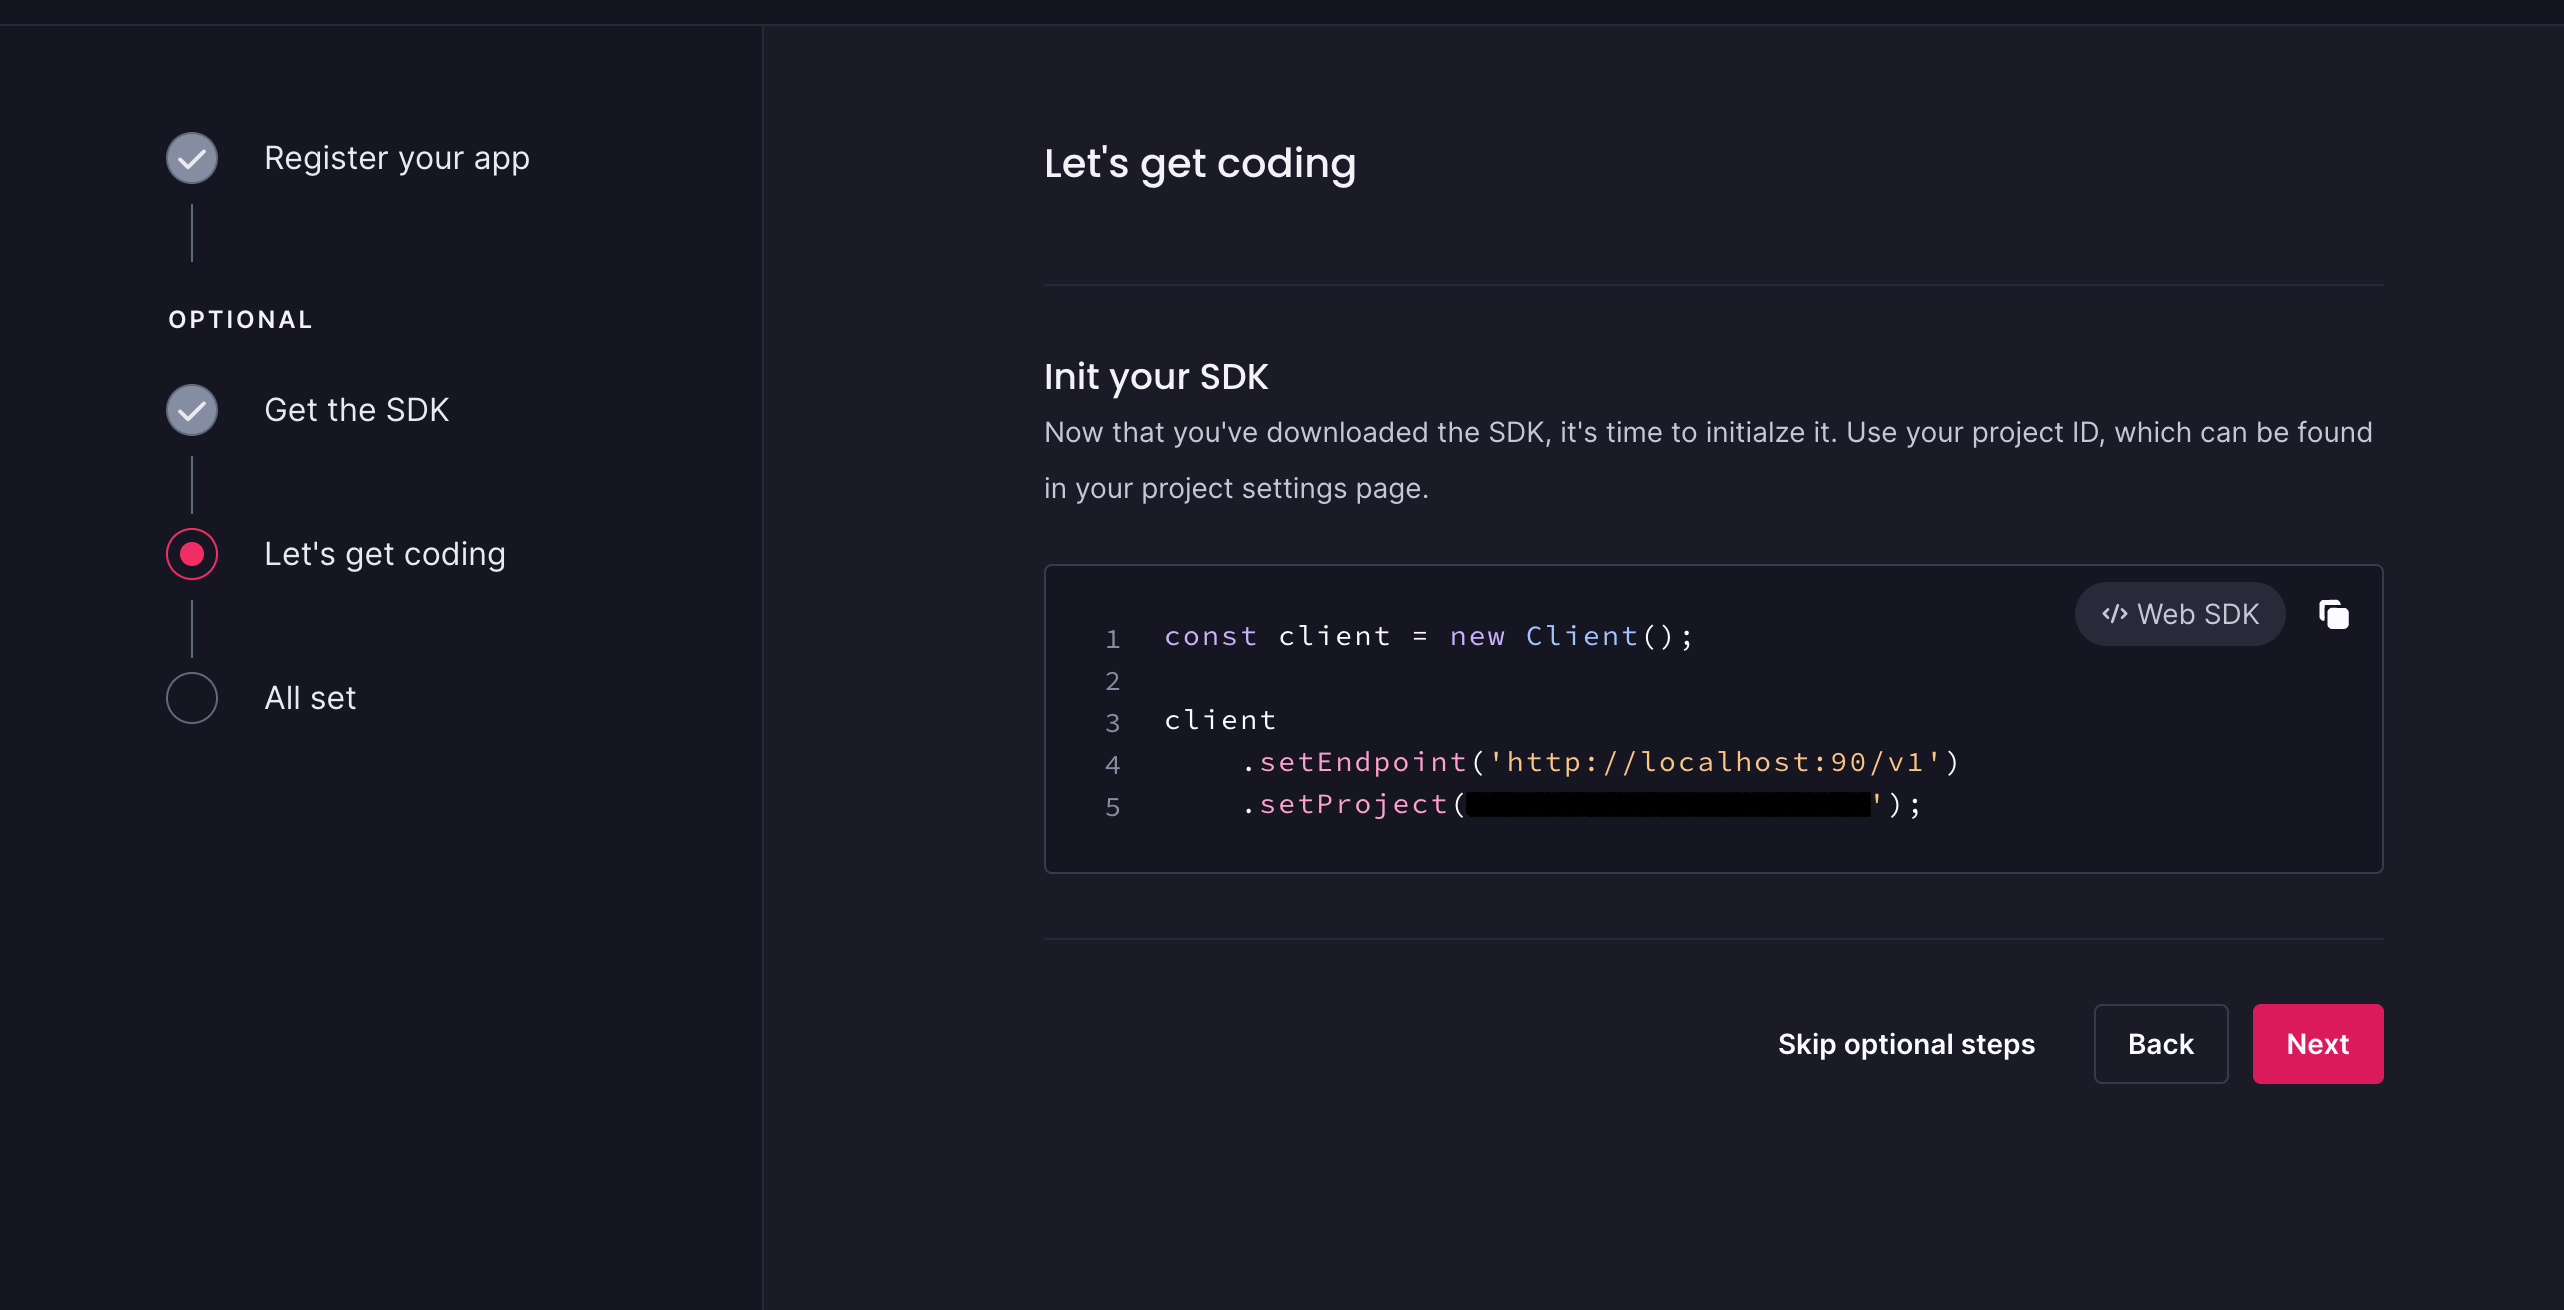
Now that we have downloaded the Appwrite SDK, we will initialize it using our project ID. Our project ID can be found on our project settings page or when we are creating a new Appwrite page.
Building Our Authentication Form with Kendo UI
We will create our form layout using Kendo UI and Vue. To do that, copy the code below:
<template>
  <section class="section-style">
    <div class="flex-container">
      <div class="text-hero">
        <img src="https://www.telerik.com" alt="" srcset="">
        <h1>Let's help you get started with our bussines</h1>
        <p>Our registration is a simple and quick process that takes no longer than 7 minutes to complete.</p>
        <div class="card-hero">
          <!-- <p>Lorem ipsum dolor sit, amet consectetur adipisicing elit. Aperiam earum quos assumenda tempore iusto
            voluptates a cupiditate unde accusamus voluptatibus nihil veniam ad iste laboriosam deleniti, atque voluptatem
            nisi blanditiis?</p> -->
        </div>
      </div>
      <card class="card-section" style="width: 450px; ">
        <h1>Get Started</h1>
        <p>Create your account now</p>
        <form @submit.prevent="sendEmail">
          <div class="form-group">
            <KInput class="form-input" :style="{ width: '290px' }" name="Name" placeholder="Name"></KInput>
          </div>
          <div class="form-group">
            <KInput class="form-input" :style="{ width: '290px' }" name="eamil" placeholder="Email" v-model="email">
            </KInput>
          </div>
          <div class="form-group">
            <KInput class="form-input" :style="{ width: '290px' }" name="password" placeholder="password"
              v-model="password"></KInput>
          </div>
          <div class="example-col">
            <kButton :style="{ width: '100px' }" id="submit-btn">Sign Up</kButton>
          </div>
          <div class="example-col">
            <p>Have an account ? Login</p>
          </div>
        </form>
      </card>
    </div>
  </section>
</template>
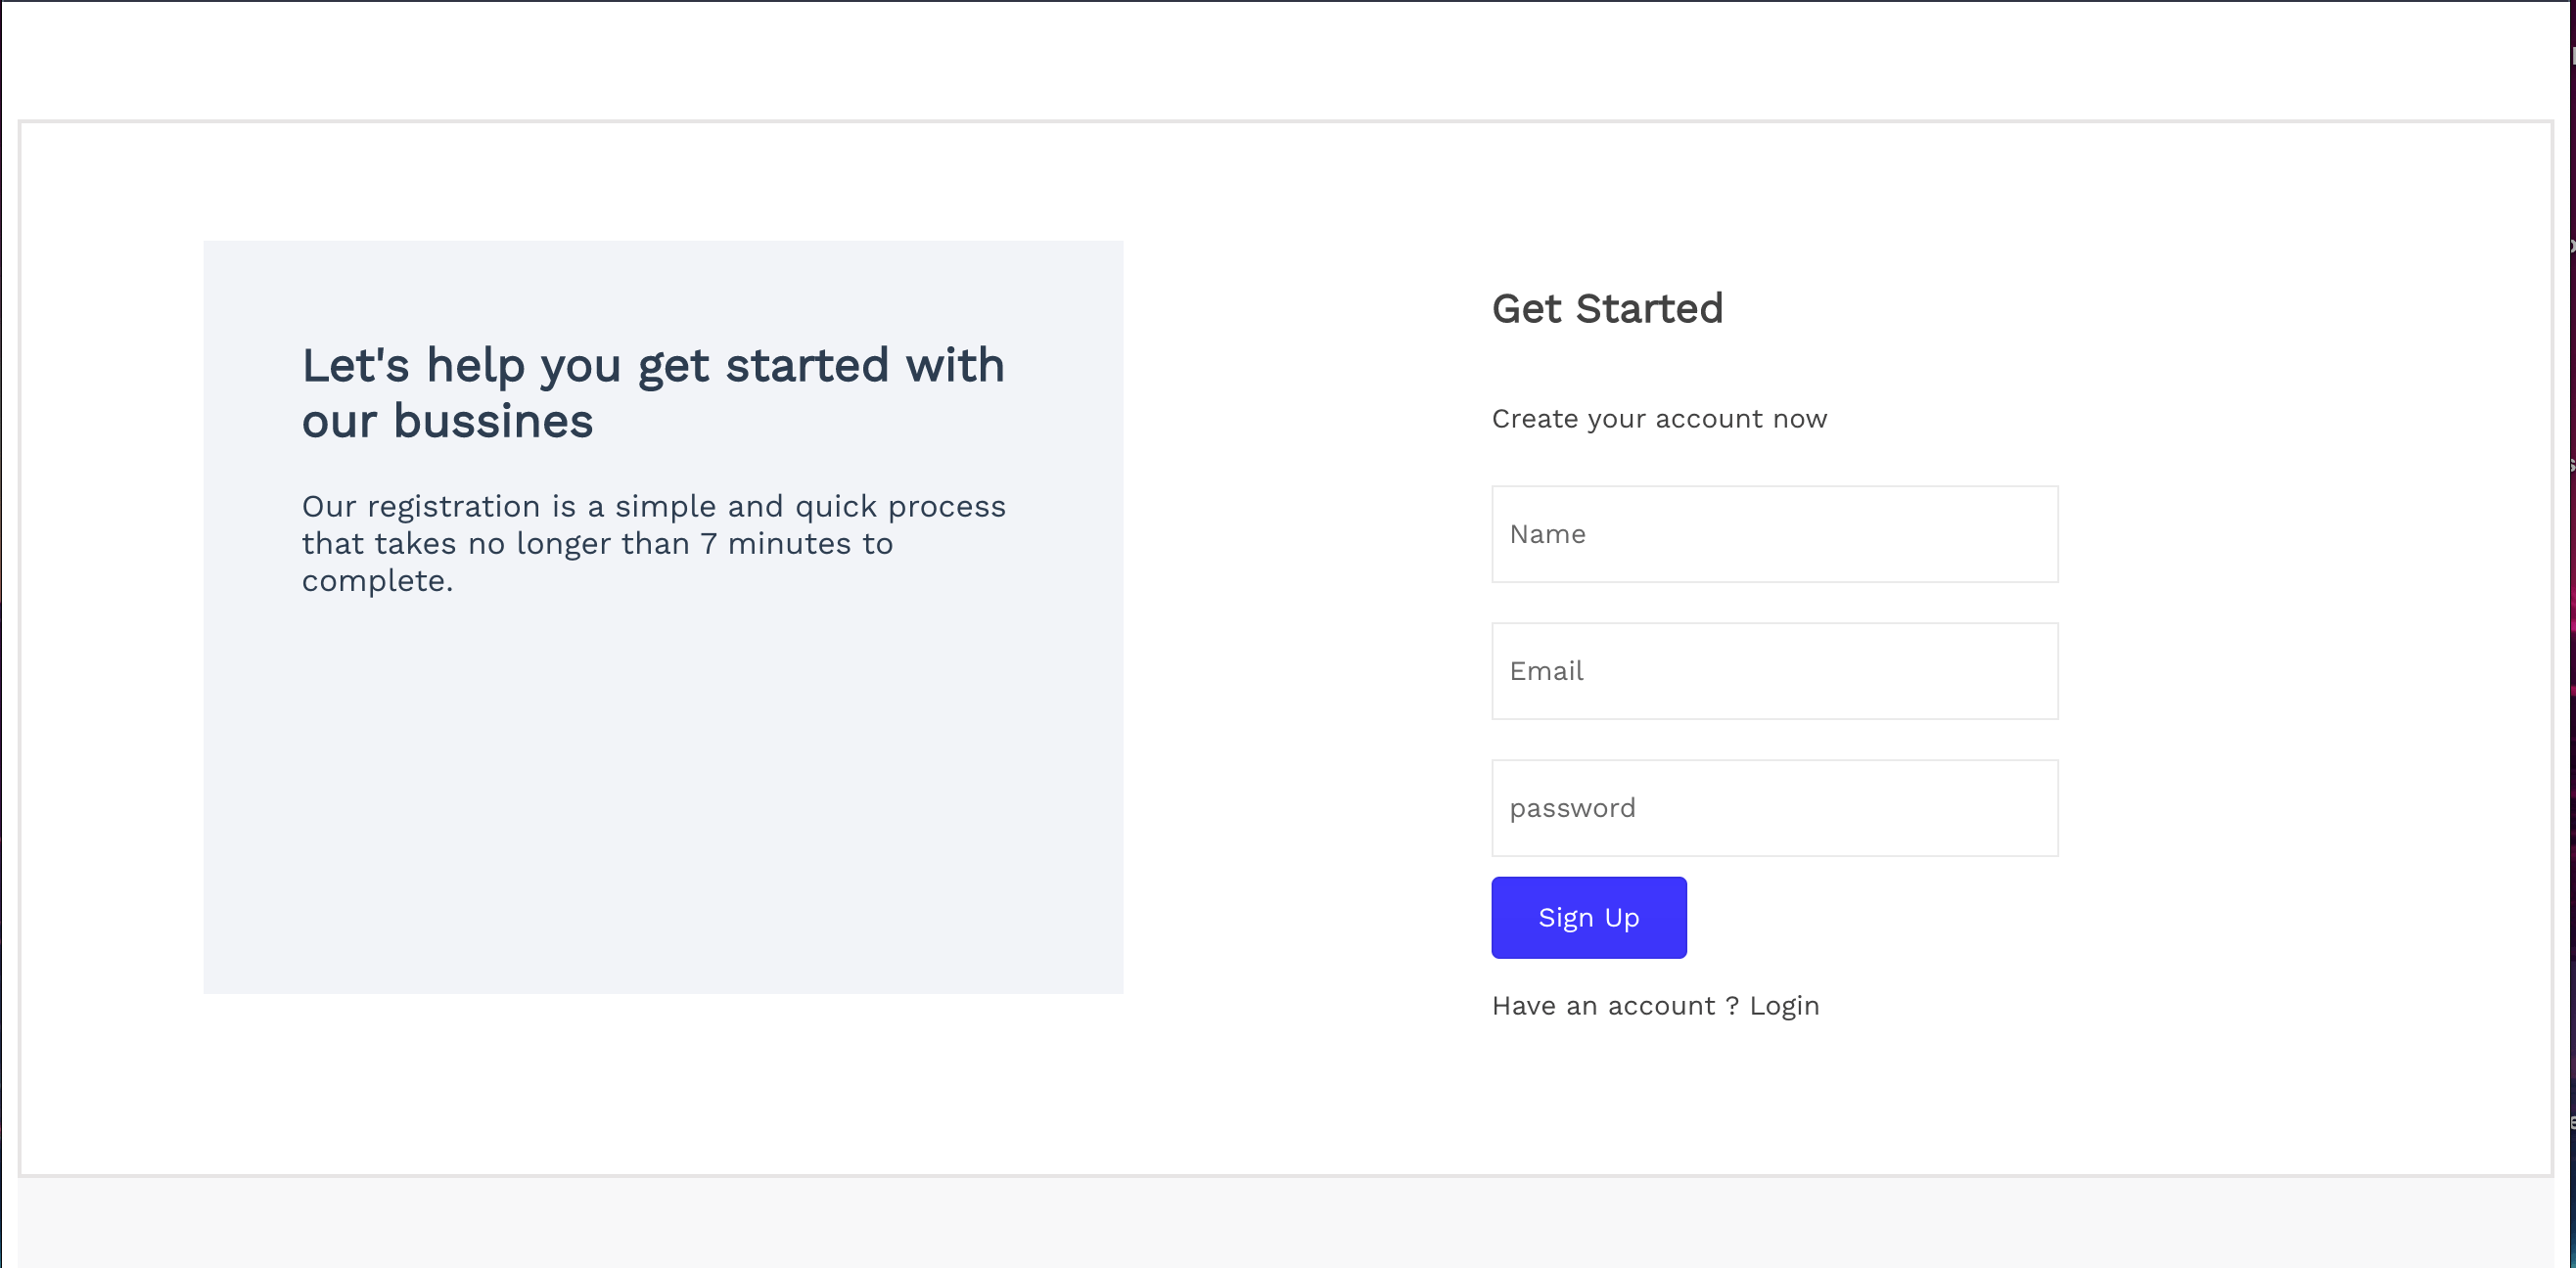
This is what our application layout looks like:
Authenticate Users with Appwrite API
We are done creating our layout with Kendo UI and Vue. The next step is to authenticate our users using the Appwrite API. To do that, we will copy the code below into our AuthPage.vue file:
<script>
import { Client, Account } from "appwrite";
const client = new Client();
client.setEndpoint("add localhost id ").setProject("input project id here");
const account = new Account(client);
export { client, account };
import {
  Card,
} from "@progress/kendo-vue-layout";
// ES2015 module syntax
import { Input } from "@progress/kendo-vue-inputs";
import "@progress/kendo-theme-default";
import { Button } from "@progress/kendo-vue-buttons";
export default {
  name: "CardComponent",
  components: {
    card: Card,
    KInput: Input,
    kButton: Button,
  },
  data() {
    return {
      name: '',
      email: '',
      password: '',
      error: ''
    }
  },
  methods: {
    async sendEmail() {
      try {
        const user = await account.create("unique()", this.email, this.password, this.name)
        console.log(user); // Success
      } catch (error) {
        console.log(error); // Failure
      }
    }
  },
};
</script>
- In the code example above, we created a data function that contains two properties, email and password. These properties are used to store user input in a form.
- The methods object defines a single method called
sendEmail. We will use the method to send the data after creating a new user account with theasynckeyword, which will return a promise. - Next, we create a try block that will be executed if no errors are encountered. Inside the try block, we create a new account using the
account.create()function. The function takes four arguments: a unique ID, the user’s email, password and name. Withunique(), we generate a unique ID for each user. If theaccount.create()is successful, the new user account will be created.
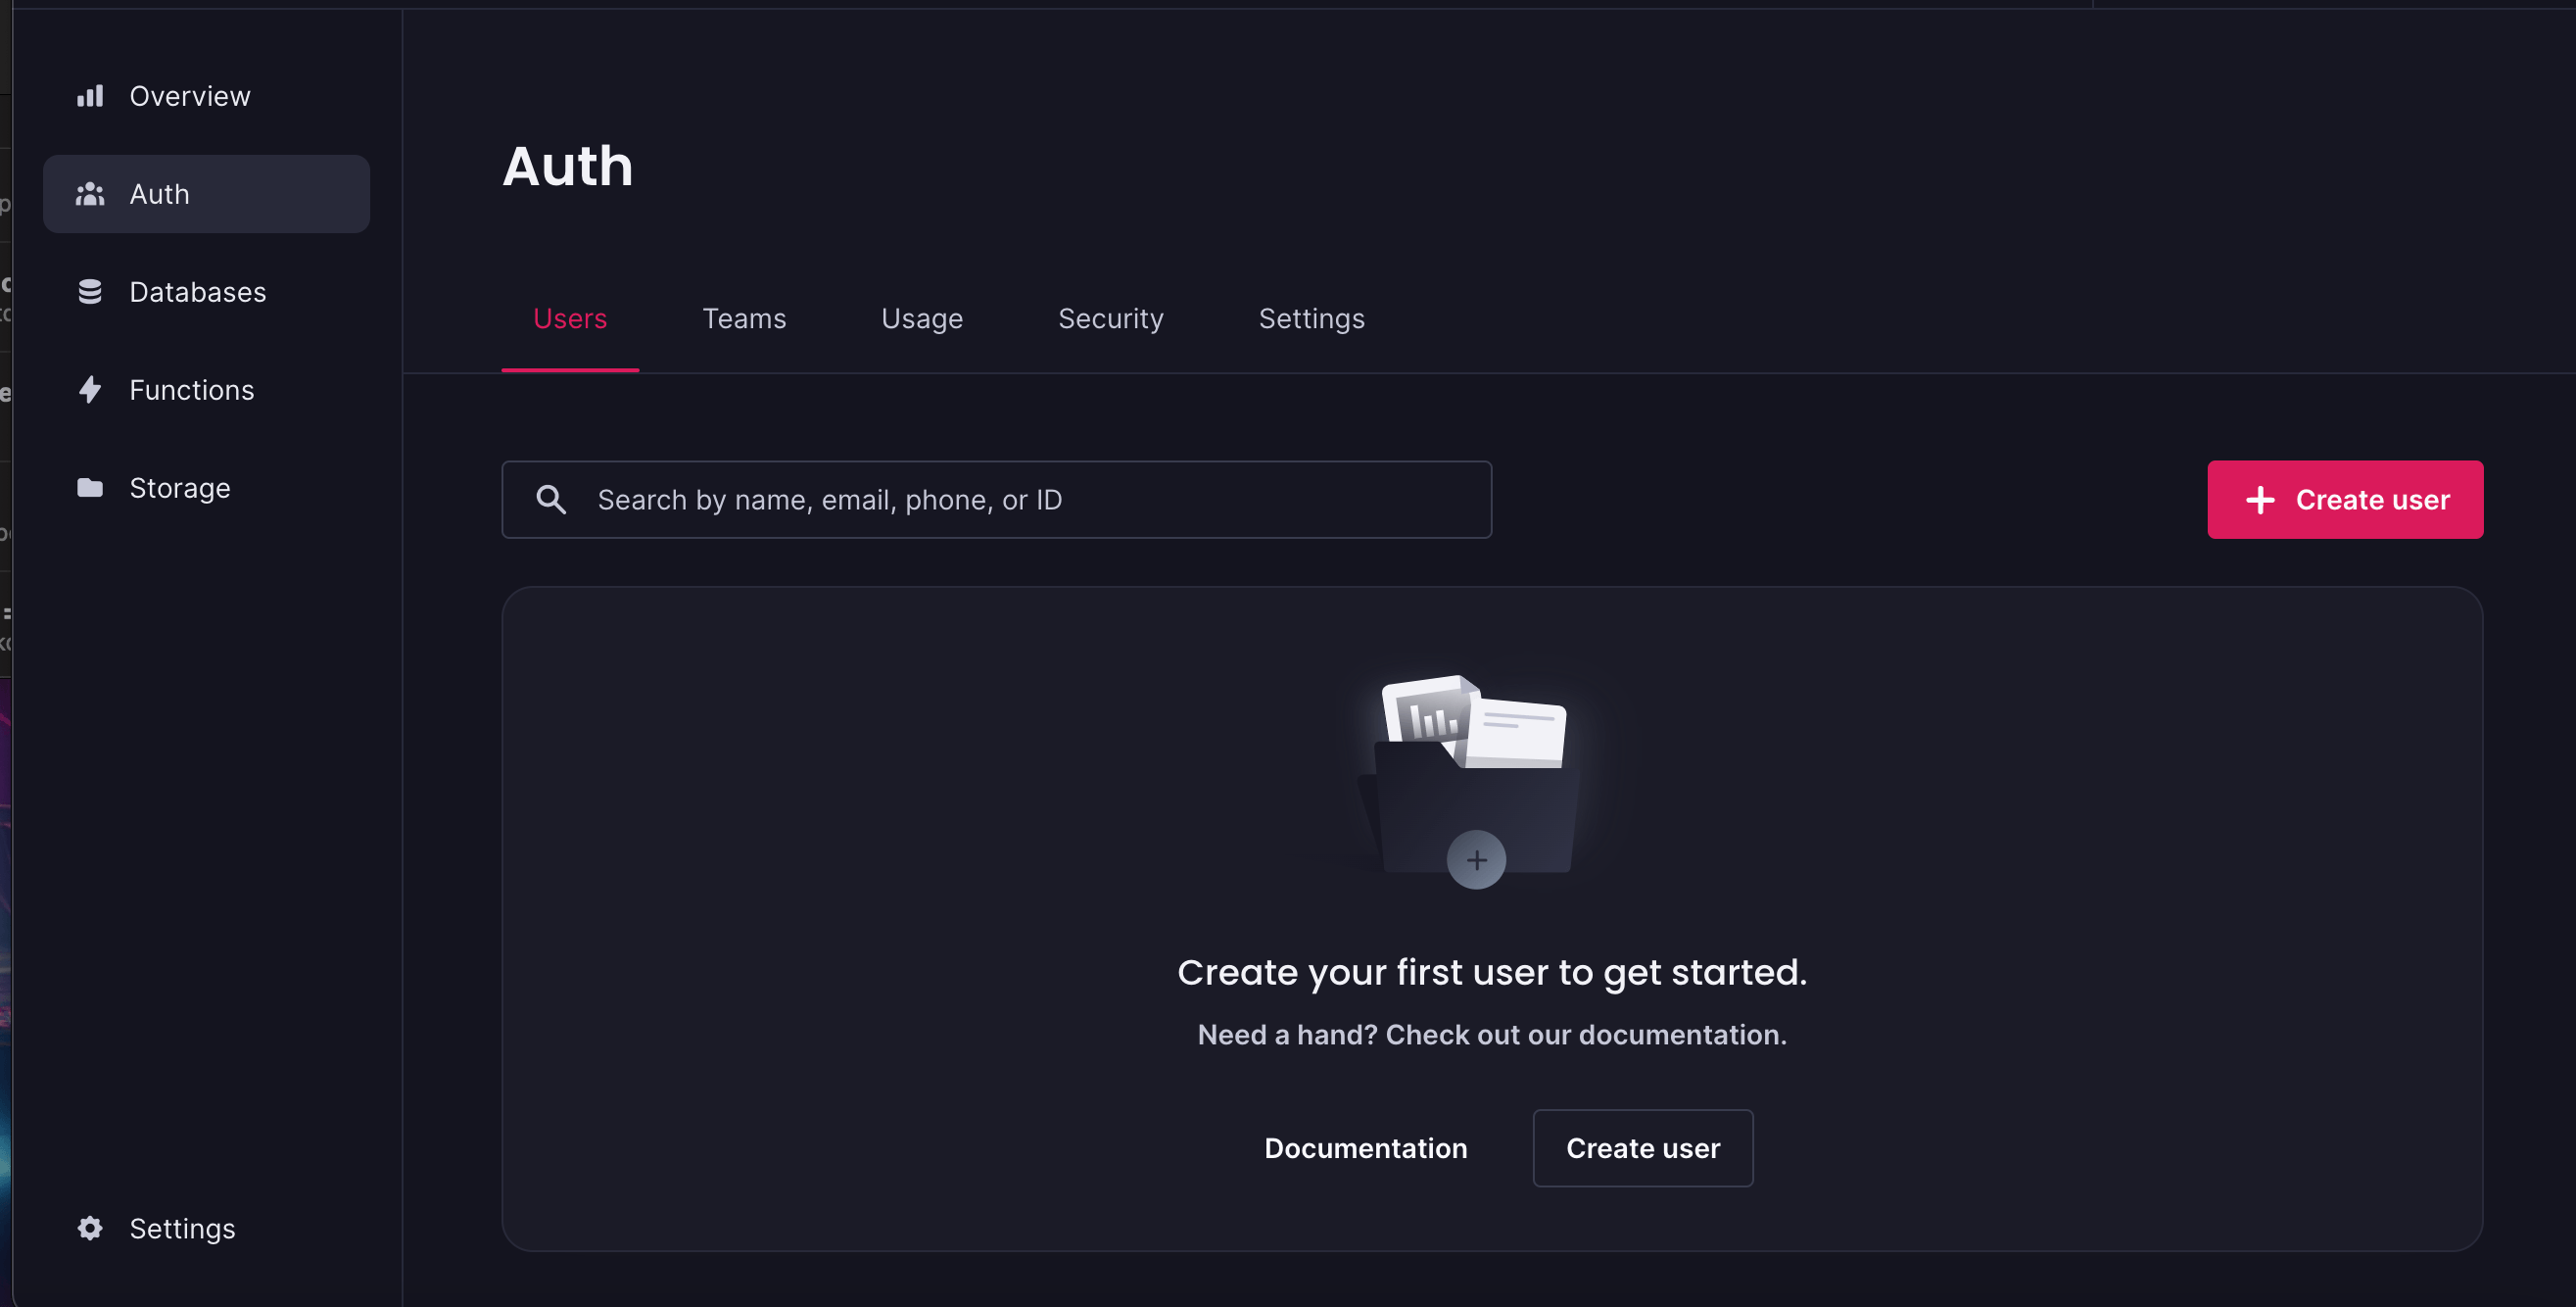
This is an illustration of how our authentication console appears prior to creating a new user.
Here is our final result after creating a new user with the Appwrite account API:

Conclusion
The Appwrite authentication system provides us with a secure and reliable way to ensure that only authorized users can access sensitive information and perform actions within an application. With Appwrite authentication strength, we can easily integrate different authentication systems into our application without worrying about the underlying security infrastructure. This article taught us how to authenticate and manage users with Appwrite.
Progress Kendo UI for Vue offers dozens of native Vue.js components including data grid, charts, form inputs and lots more. Give it a try for free!