Quantcast
Channel: Telerik Blogs
Viewing all 4183 articles
Browse latest View live

Component Spotlight: PanelBar

$
0
0

Explore how Kendo UI takes the pain out of creating a fully functional and styled PanelBar.

If you read the previous article in this series, you now know how TabStrip components are used in navigation to display related but different content on a page. The next component for you to conquer is the PanelBar.

A PanelBar is a container with sections stacked vertically on top of each other that can be expanded or collapsed. One use for a PanelBar is to organize a deep navigational hierarchy. In an earlier spotlight, you saw how to achieve a nested navigation using cascading dropdowns in the Menu component. That is fine when you have only a few links in the dropdown. However, when the dropdown becomes too deep, it is better to put those child links in a PanelBar.

Next, I will show you how Kendo UI takes the pain out of creating a fully functional and styled PanelBar.

Basic PanelBar for Navigation

First, let's take a look at the minimal code needed to implement a PanelBar. The markup is similar to creating a menu. You will use a <ul> element for the root of the component. Each <li> element acts as a panel. Any <ul> element nested inside of a <li> element is the content that will be shown when the panel is expanded. This is an example of a PanelBar that has been styled using the Kendo UI Bootstrap theme:

Kendo UI Panelbar

<!DOCTYPE html>
<html>
<head>
  <title>Kendo UI Panelbar Example</title>
  <link rel="stylesheet" href="https://kendo.cdn.telerik.com/2018.1.221/styles/kendo.common-bootstrap.min.css" />
  <link rel="stylesheet" href="https://kendo.cdn.telerik.com/2018.1.221/styles/kendo.bootstrap-v4.min.css" />
  <link rel="stylesheet" href="https://kendo.cdn.telerik.com/2018.1.221/styles/kendo.material.mobile.min.css" />
  <script src="https://kendo.cdn.telerik.com/2018.1.221/js/jquery.min.js"></script>
  <script src="https://kendo.cdn.telerik.com/2018.1.221/js/kendo.all.min.js"></script>
  <style>
    body { font-family: helvetica; }
  </style>
</head>
<body>
  <ul id="panelbar">
    <li>
      Books
      <ul>
        <li>Sci-Fi</li>
        <li>Young Adult</li> 
        <li>Non Fiction</li>
      </ul>
    </li>
    <li>
      Movies
      <ul>
        <li>Comedy</li>
        <li>Action</li>
        <li>Sci-Fi</li>
      </ul>
    </li>
    <li>
      Electronics
      <ul>
        <li>Phones</li>
        <li>Computers</li>
        <li>TVs</li>
      </ul>
    </li>
  </ul>
  <script>
    $(document).ready(function() {
      $('#panelbar').kendoPanelBar();
    });
  </script>
</body>
</html>

In a PanelBar component, selecting a link pushes the content down beneath it to reveal the submenu. Whereas in a Menu component, selecting a link reveals a dropdown that lays over the content on the page.

Building a PanelBar from a Data Source

You can skip writing markup and configure your PanelBar through its options. Building your PanelBar from a data source as opposed to hardcoding the HTML gives you more flexibility. Instead of thinking of the component as HTML, you can think of it as data. When you want to change the component, you can change its data or use one of its methods. This is the refactored code for creating our navigation using the dataSource option:

<ul id="panelbar"></ul>
<script>
  $(document).ready(function() {
    $('#panelbar').kendoPanelBar({
      dataSource: [
        {
          text: 'Books',
          items: [
            { text: 'Sci-Fi' },
            { text: 'Young Adult' },
            { text: 'Non Fiction' }
          ]
        },
        {
          text: 'Movies',
          items: [
            { text: 'Comedy' },
            { text: 'Action' },
            { text: 'Sci-Fi' }
          ]
        },
        {
          text: 'Electronics',
          items: [
            { text: 'Phones' },
            { text: 'Computers' },
            { text: 'TVs' }
          ]
        }
      ]
    });
  });
</script>

Other Uses for a PanelBar

A PanelBar can also be used as a controller to edit content. If you were building a photo editing application, you could have a PanelBar with a layers panel, a colors panel, and a history panel. Selecting a panel would reveal the tool. The view for each tool may take up considerable space and hiding the content in panels keeps the user's workspace nicely organized.

A PanelBar can also be used to direct a series of actions or steps. Say you have a checkout form and you need the user to provide their shipping address, shipping method, and payment method. You don't want to ask for all of the information up front, but you also don't want to put the information on different pages. Instead, you use a PanelBar to break the checkout flow into multiple parts. This is an example of what your checkout form would look like:

Kendo UI Panelbar

Comparison of Navigation Components

In this series, you have been introduced to several components for navigation. It might be confusing to know when to use each type. It may appear that they do the same thing but differ only in looks. That is not the case. Choosing the right component in the right place makes your app more usable. The main navigational components you have seen thus far are the ButtonGroup, Menu, TabStrip, and now the PanelBar.

Below is a summary with some basic information on each to keep in mind:

Kendo UI Panelbar

Conclusion

The PanelBar gives you another way to show and hide content. This information hiding is important to avoid overwhelming the user with too many choices. You have several choices for designing navigation, but you don't have to pick just one. You can, and should, combine components. You may have a menu with a few links fixed to the top of your page and a button that opens a navigation drawer made from a PanelBar. Experiment to see what works best for you.

I mentioned in the table above that button groups can be used for toolbars. Well, there is no need to use a button group to create a toolbar because Kendo UI has a toolbar component, which we also covered in this spotlight series. And it has many more features so you customize the behavior exactly how you want. If you have been following along, you have acquired more than enough knowledge to try out your Kendo UI skills on applications in the wild. See you on the web.

Want to Try Kendo UI?

Want to start taking advantage of the Kendo UI panelbar, or any of the other 70+ ready-made Kendo UI components, like Grid or Scheduler? You can begin a free trial of Kendo UI today and start developing your apps faster.

Start My Kendo UI Trial


Why TypeScript Might Be a Good Fit for your Next Project (with Video)

$
0
0

JavaScript’s history is somewhat checkered: it started as something we all did to make horrific, GeoCities-style Web sites, and it took a while for the language to shake its script-kiddie reputation as it gained popularity. Today, though, that past is all but forgotten as JavaScript dominates web development. (And JavaScript itself has evolved.)

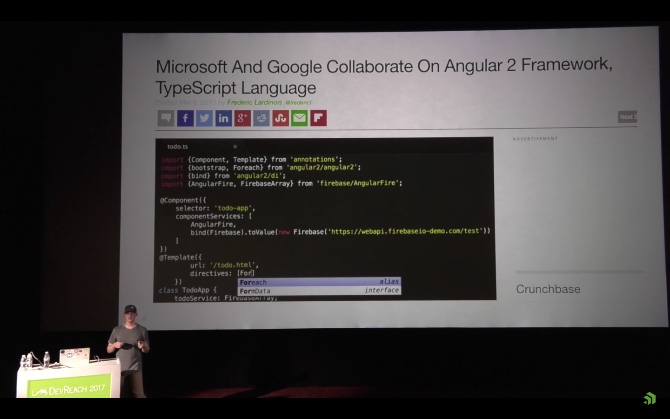
There are — as TJ VanToll points out in his DevReach talk featured below — 345 languages that will compile to JavaScript through various tools so that people don’t have to actually code in JavaScript. He explains that TypeScript initially seemed like a Very Bad Idea, in the same vein as CoffeeScript or Dart. Why not just stick with JavaScript in the first place? Why something that compiles to JavaScript? Despite VanToll’s admitted early skepticism, TypeScript turned out to be very useful, indeed.

In this talk, you will take a brief dive into the history of CoffeeScript and Dart and learn why they failed. CoffeeScript is only about 9 years old, but peaked in about 2011. VanToll suggests that CoffeeScript has a high learning curve for a JavaScript developer; it’s much more applicable to the Ruby developer, in itself a smaller subset.

Dart, created by Google in 2011, was initially feared to be a JavaScript replacement… but ultimately no-one cared. He again argues that the language itself was too foreign to the JavaScript developer.

Microsoft introduced TypeScript in 2012 and for a while, it existed in a Microsoft bubble. He watches these closely as a developer advocate to better predict what tech is on the rise, and what is on the wane.

When they started building NativeScript modules, they started building it with TypeScript … and he initially thought that was a mistake because the trends didn’t look good. In 2014, Microsoft didn’t have a great reputation among JavaScript developers.

One big change was Google’s switch from the Angular 2 framework to TypeScript; another was Microsoft’s announcement of Visual Studio Code, a great editor (likely in the top 5 of developer editors).

But how do you know if TypeScript is right for your project? VanToll walks you through some clear demos of TypeScript transcoding to JavaScript so you can assess what a function transcode might do in the real world. It can help you apply types, for example, and thus help you avoid bugs.

Should you use it? VanToll explains. If you’re building something small - perhaps not. But a complex or large app, then likely so. If you’re building something on your own - maybe not. But on a team, or working with others, the value increases. Plus - if you’re working with unfamiliar codebases, it’s a lot easier to parse and explore a TypeScript app. And finally, if you have developers who are *not* JavaScript developers, they’re going to be happier, more productive.

Watch VanToll’s presentation for a great summary of TypeScript’s value - and a handy checklist for assessing its viability for your projects. Watch the whole talk from DevReach 2017:

About the Presenter

Thanks to TJ VanToll for this excellent guide to TypeScript. He’s a developer, writer, speaker, and Principal Developer Advocate at Progress.Find him at: @tjvantoll, GitHub, and www.tjvantoll.com

Top 3 Reasons Preventing Developers from Doing AR

$
0
0

Augmented reality and virtual reality are gaining steam in the market. So why haven't more developers hopped on board?

Over the past few years, major enterprises and small businesses alike have set their eyes on the future of augmented reality and virtual reality. They are looking at everything from what potential value it could provide to their customers to how they (as a business) can benefit from these new technologies, either financially or organizationally.

Of course, we here at Progress have been considering the possibilities of AR/VR too!

For the past six months, we’ve been doing R&D with the AR/VR technologies of today to see what we can do in this space. Historically, we’ve always tried to be ahead of the curve when it comes to new tech and this case is no different. The potential of the market turned out to be huge, as it is forecasted to reach some $215 billion by 2021 according to Statista and, as a company working in the IT sector for years, we believe we can add a lot of our existing expertise into this space. You can read more about our findings thus far in my previous blog.

We decided to set up a small team of experienced developers and product people and started building our first deliverable—a fully functional demo application built with Unity3D, which is targeting the Microsoft HoloLens device. We were pleased with the results and managed to successfully complete our initial milestone, which was to have the demo ready for the Microsoft Build 2018 conference. This enabled us to put it in the hands of developers and business owners to get their feedback and see what their reactions would be.

Screenshot of HoloLens App Screenshot of the demo, took using a Spectator View setup


What We Learned

Our goal with the launch of the sample application was to showcase an example of AR in today’s world and hear how people feel about doing AR/VR development, and what potential implications they see for it in their business.

I also attended the ProgressNEXT 2018 conference, where I had the chance to talk to many clients, partners and colleagues about AR/VR and further validate what we learned at Build 2018.

The bottom line of my observations is that people are excited by AR/VR but very few of them actually do or are willing to do anything in this space. However, most of them believe that this technology will inevitably become mainstream at some point in the near future, which I might add was not surprising to us at all. According to the Chasm Theory, we are still in the “Innovators” phase of the adoption curve, meaning that still only a small portion of people (the innovators, ~2.5%) are actively looking into it.

Technology Adoption Life Cycle Graph
So, that being the case, what’s preventing developers from diving into AR/VR? Following multiple discussions with innovators and technologists, we discovered the top three reasons why many developers are not actively pursuing AR and VR development.

1. I Have No Business Requirement to Make Such Apps

Indeed, this is a very simple and yet solid reason for not engaging in AR/VR today. The business and market is simply not there yet. The technology is emerging and most of the problems today are solved with conventional technologies. Early investments in emerging technology imply higher risk and most of the companies would be reluctant to risk more than necessary. This leads us to the second reason.

2. I See No Value in Using AR/VR to Solve My Problems

Many people simply don’t see the value that AR/VR brings to the table in terms of solving business problems or improving user experiences. And that’s fair. Most, if not all, of problems today can be solved with existing mature technologies, which is “good enough” for most of the businesses. The “Innovators” group is only around 2.5% of the population, right? As the technology expands and evolves, we expect that more people will hop on the train and have a better understanding of how they can leverage it to their advantage.

3. The HoloLens Device Is Pretty Expensive

Interestingly enough, many people thought that the only way to do AR for business is through the Microsoft HoloLens device. This assumption probably stemmed from the fact that we were showcasing our demo application through HoloLens. But yes, a $3,000 investment per single device requires a strong validation about the added value of the technology. However, the AR/VR space extends much further than a single device and you can “attack” multiple devices at the same time even today. We’ve seen lots of new products being launched targeting this market, from MagicLeap and Meta 2 to Google Glass Enterprise Edition,  and it’s only a matter of time before they start moving into general adoption.

Our Recommendation

The three issues listed above are valid, reasonable and solid ones. Still, it is our belief that we can completely understand a technology and its strengths only if we do some practical experiments and dive deep into its internals. As Morpheus once said in my favorite movie:

“Unfortunately, no one can be told what the Matrix is. You have to see it for yourself.”

Personally, I was also a skeptic at the very beginning when we started our internal conversations. I thought that AR/VR is all about gaming and entertainment, and that our company should not go into this space—but I was wrong. So, what would I advise you to do?

Start Experimenting!

It’s really hard to truly understand the space unless you go ahead and get your hands dirty first. Regardless of whether you’ve been coding for half your life or recently started on your first job as a dev, you know that results only come with actual work. That being said, if you are a C# developer (or at least have knowledge of the language), a good starting point for you could be our demo application—we have provided a download package with the complete source code.

The HoloLens device is expensive but you can use Unity3D built-in emulator or the HoloLens emulator that comes with the development tools. Besides, if you step on Unity3D for AR/VR development, you can export to virtually any device that exists today. HoloLens is not the only option—in fact, it is the most expensive one and is specifically positioned to target enterprise verticals.

Once you have a better understanding of the technology, you can spot some opportunities for solving existing problems more efficiently through AR/VR. I was legitimately surprised to discover how many use cases exist (even today) that can be solved more effectively through AR/VR than conventional technologies.

I am very curious to hear your thoughts on this subject as well as your expectations of the potential of this market, so feel free to post in the comments below or drop me a line via Twitter and we can kick off a discussion.

Thanks, and good luck!

This blog was written by Georgi Atanasov with help from Panayot Cankov. A version of this blog was originally posted on the Telerik AR/VR Medium blog.

120+ Fixes & New Features in UI for WPF and WinForms [New SP]

$
0
0

Enjoy more than 120 fixes plus new features in Telerik UI for WinForms and Telerik UI for WPF in the R2 2018 service pack release.

The latest service pack (for R2 2018) of Telerik UI for WinForms and Telerik UI for WPF is now live! In this update, we have focused our attention on addressing client feedback and resolved 120+ public items (around 60 for each of the suites). While most of the improvements were fixes, we also managed to add some new features in the controls as I'll describe below.

Let's dive into what's new for UI for WPF/Silverlight and Winforms.

New Features

Telerik UI for WPF/ Silverlight

  • RadDomainDataSource (Silverlight): Introduced the Telerik.Windows.Controls.DomainServices.OpenRia45 assembly, which is built against the latest version of OpenRiaServices.
  • RadVirtualGrid (WPF):Introduced a couple of new methods of the control that will help you achieve even more:
    • GetRowIndexAtMousePosition/GetColumnIndexAtMousePosition - the methods return the row/column index for a given mouse position.
    • CloseFilteringControl - allows you to easily close the FilteringControl if open. (link)
  • RadTreeListView: Added the AutoExpandItemsAfterFilter property, which controls whether the hierarchy items should be expanded after filtering. (link)
  • RadWatermarkTextBox: Auto-opening of the Touch keyboard on Windows 10 with Anniversary update now works out of the box for all input controls that contain WatermarkTextBox.
  • RadPdfViewer: We’ve extended the number of supported PDF document scenarios by handling invalid concatenation of content streams.

Telerik UI for Winforms

  • RadMap:The route request of the Bing map provider now supports ViaWayPoints. This will allow a route to be calculated with intermediate points. For example, making a trip from Seattle to L.A through Las Vegas. (link)ui-for-winforms-radmap

    Another update in the RadMap control is that the TileSize can now be specified when LocalMapProvider is used. In addition, the MapVisualElementFactory is now responsible for the initialization of the tile elements. (link)

  • RadMaskedEditBox:The standard mask provider now exposes a MaskCompleted property, indicating whether all the required input has been entered into the mask.
  • RadChartView: We have added a new LassoSelection controller for easy selection of data points. The selected data points can be retrieved by handling the LassoSelectedPointsChanged event of the controller. (link)ui-for-winforms-radchartview
  • RadBreadCrumb: A new mode allowing a selection in the associated tree directly after clicking an element in the breadcrumb. (link)

Improvements

As I mentioned earlier this Service Pack is packed with improvements, so don't forget to check the full release notes for WPF here and for Winforms here..

Share Your Feedback

Make sure to download and try the latest versions of UI for WPF/Silverlight/Winforms and explore all the new features and themes. They are already available for download in your account.

Are you new to our UI tools? You can download a trial right here.

UI for WPFUI for Silverlight
UI for Winforms

We would love to hear what you think, so please drop a comment below sharing your thoughts. You can also visit our Feedback Portals about UI for WPF/Silverlight, Winforms and Document Processing Libraries and let us know if you have any suggestions or if you need any particular features/controls.

In case you have missed our latest official release (R2 2018), you can find some of the major updates for WPF in my blog post and for Winforms in this blog post.

Chatbots and Mobile Apps: Choosing the Right Integration

$
0
0
Chatbots and Conversational UI have more in common with mobile apps than you might think. In this blog, Stefan Stefanov looks at the different ways companies integrate chatbots with mobile apps today.

The go-to use case for a chatbot is deploying it within an already established messaging channel such as Facebook Messenger, Slack or Skype. However, most organizations are looking to build chatbots that communicate with customers in their proprietary or private channels for obvious security reasons. A web chat on a website is commonly used among enterprises for the purpose of live chat or chatbot self-service. And some companies are transferring this conversational experience straight into their mobile apps.

There are three main ways companies integrate chatbots and mobile apps today: chatbot as an app, chatbot in a tab and chatbot as UI. Each of the approaches calls for a different objective with its pros and cons.

#1 Use Case: Chatbot as an App

The first use case is the most straightforward one. You simply bundle a chatbot within a mobile app and distribute it to the app stores. Your main objective with this approach is to provide a dedicated, always-on channel for your users to perform customer self-service.

Example

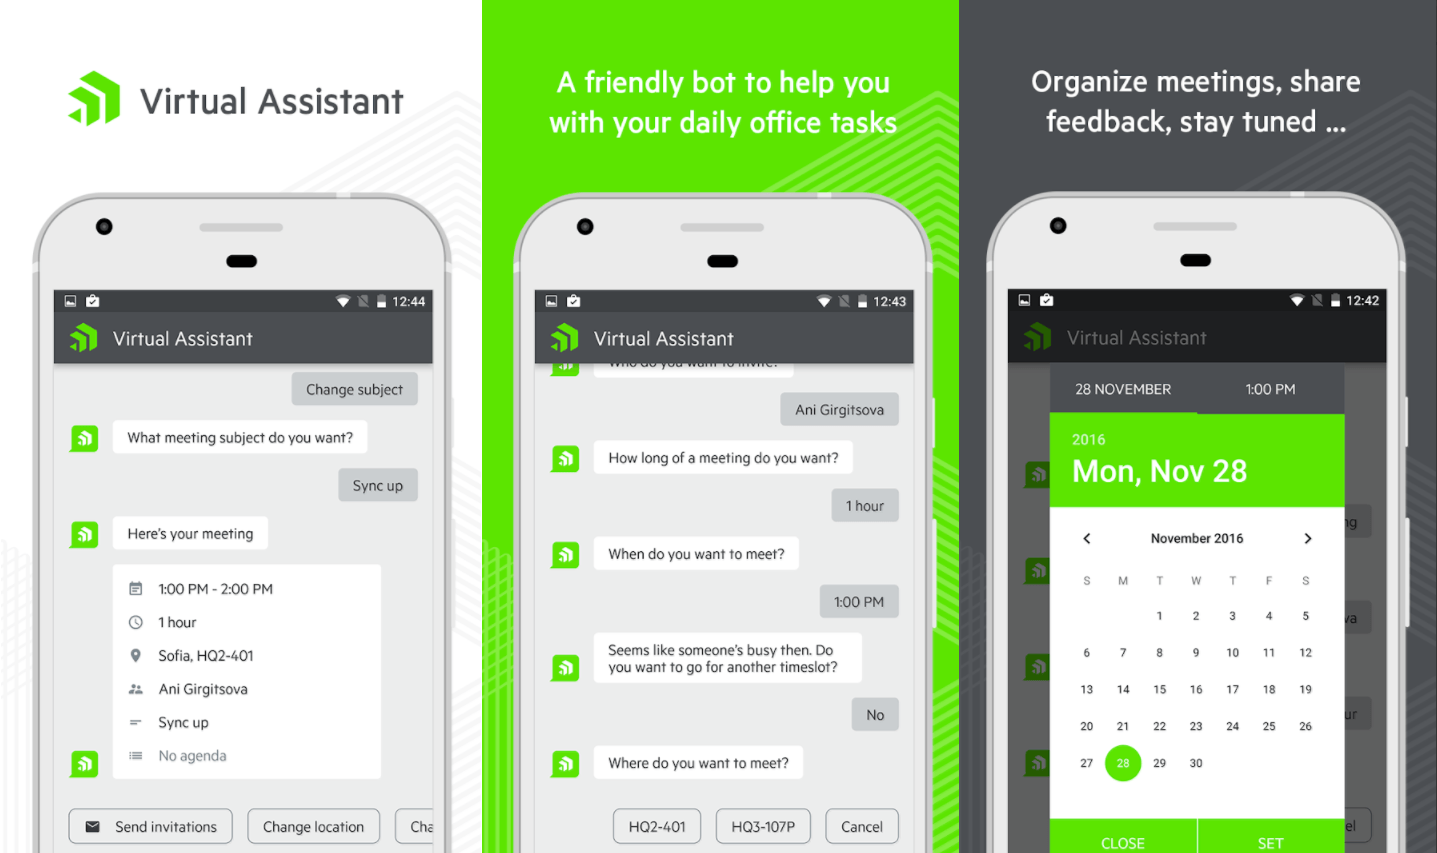
Progress Virtual Assistant chatbot enables our employees to deal with organizational and administrative tasks at work. The chatbot is distributed through a mobile app that facilitates the authentication of users against the corporate domain infrastructure.

Progress Virtual Assistant

Source: Progress Virtual Assistant mobile app for iOS built with NativeScript

Pros

  • No data is shared with social networks or third-party companies.
  • Cheaper to develop compared to a mobile app with similar features.
  • Removes the complexity of building and supporting complex UI screens and interactions.
  • You completely control the rich UI within the conversational UI and you don’t depend on the limitations of external messaging providers.
  • No learning curve for users. This is only true if you are building a transactional chatbot.

Cons

  • Users still have to go and download a mobile app instead of simply using a direct web or social channel.
  • A new mobile app means extra acquisition costs to establish a user base.
  • Some mobile features such as charts or shopping cart experiences might be easier to use in a traditional UI.

When to Use

Interestingly enough, in conversations our Progress NativeChat team had with customers willing to build chatbots as dedicated mobile apps, they identified that the majority of use cases where companies want to build chatbot as an app are focused on internal, employee-facing scenarios. One of the reasons being that enterprise-grade messaging platforms like Skype for Business are still trying to catch up with the consumer platforms in terms of chatbot support, adoption and ecosystem.

#2 Use Case: Chatbot in a Tab

The biggest challenge with the first approach is that it effectively introduces a completely new channel in the form of a separate app that requires additional effort and resources to grow. And since app fatigue is a real thing, a more effective way would be to incorporate a chatbot in an already existing mobile app that has an established user base.

Example

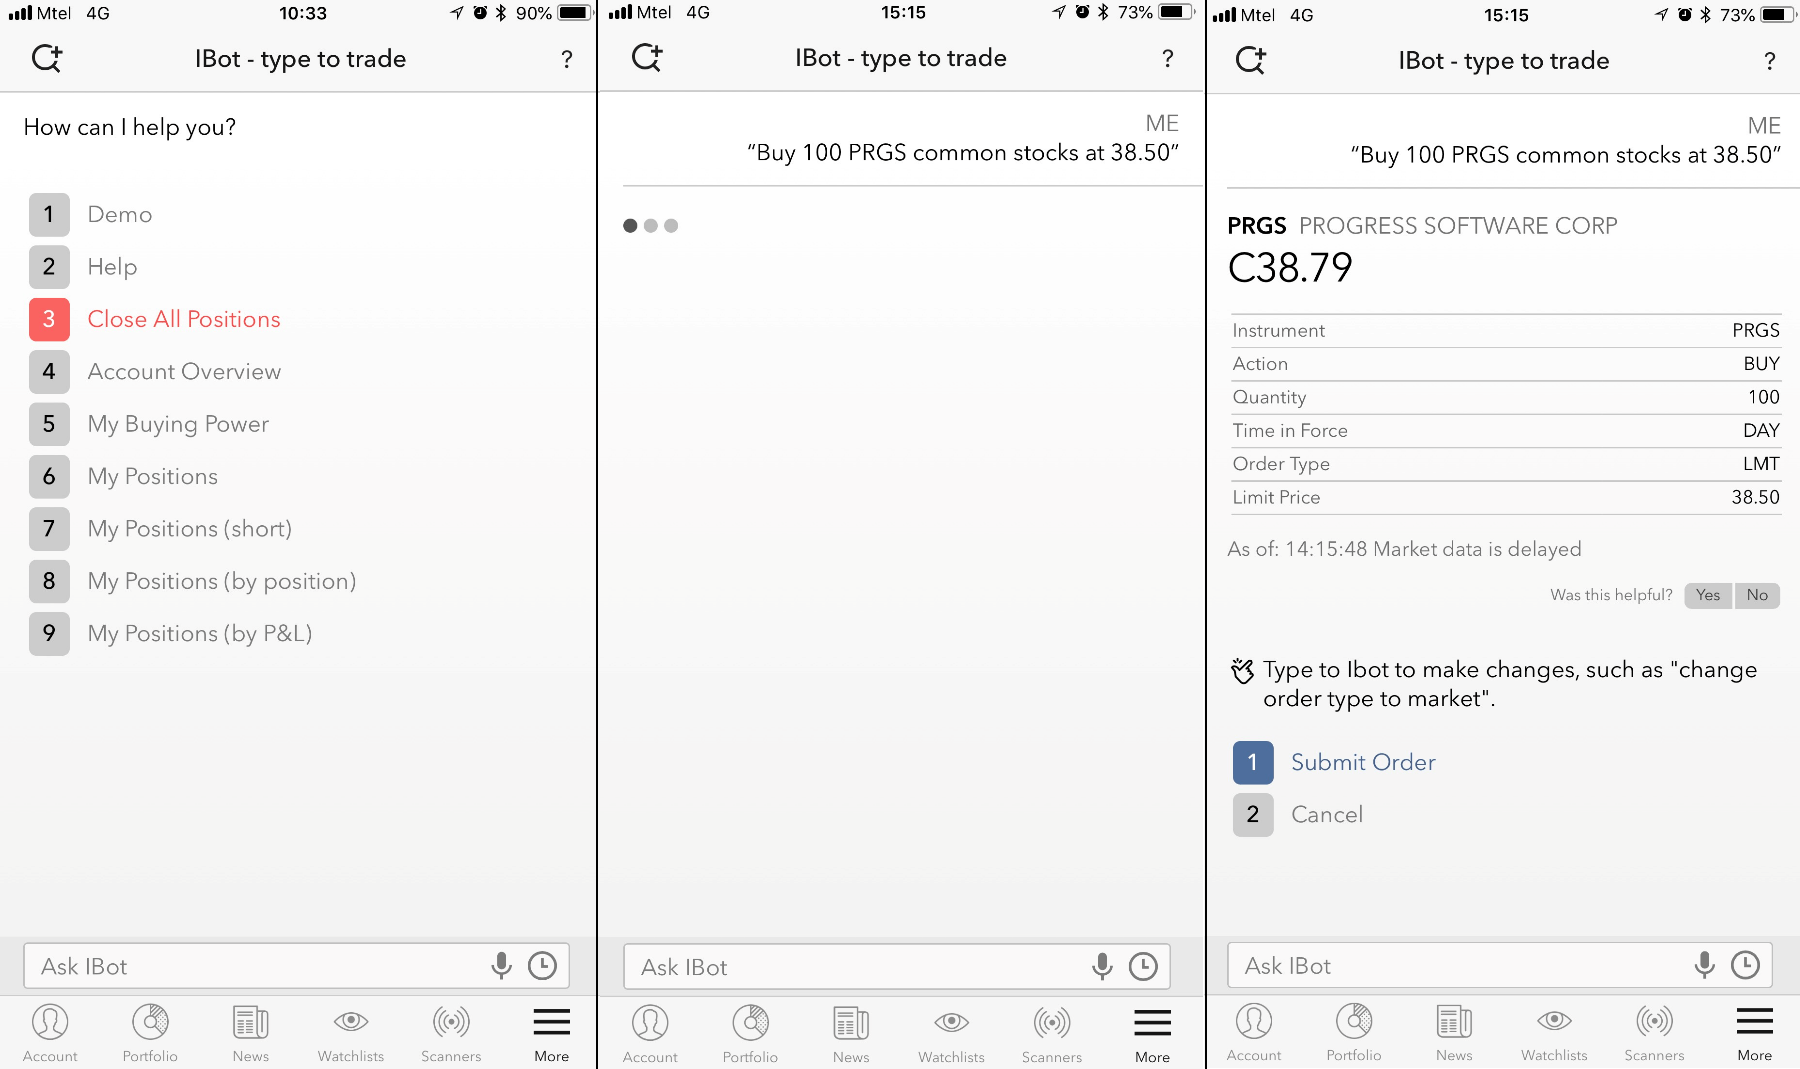
The IBKR Mobile trading app from Interactive Brokers provides electronic access to stocks, options, forex, futures and futures options in a comprehensive and immersive mobile app. To complement the mobile experience, Interactive Brokers has created a separate tab for its IBot chatbot.

IBKR Mobile Trading App

Pros

  • You can introduce a chatbot to an existing audience.
  • Users have traditional UI and conversational UI as options to choose from.
  • You can reuse authentication mechanisms and security options already present in the mobile app.

Cons

  • If your chatbot is simply a replica of the mobile app’s functionality, users might not understand when and why to use it.

When to Use

The best way to build a chatbot within your existing mobile app would be if you have lengthy and repetitive forms that you want to optimize. Structured processes such as submitting stock orders, signing up for insurance or opening a bank account are good candidates. Also, newly acquired users tend to feel more comfortable with a chatbot getting-started experience rather than with complex UIs.

#3 Use Case: Chatbot as Conversational UI

The third approach takes no prisoners. Instead of siloing the chatbot in a separate app or cornering it, you can simply use conversational UI instead of traditional UI in common places of low engagement and high abandonment rates.

Example

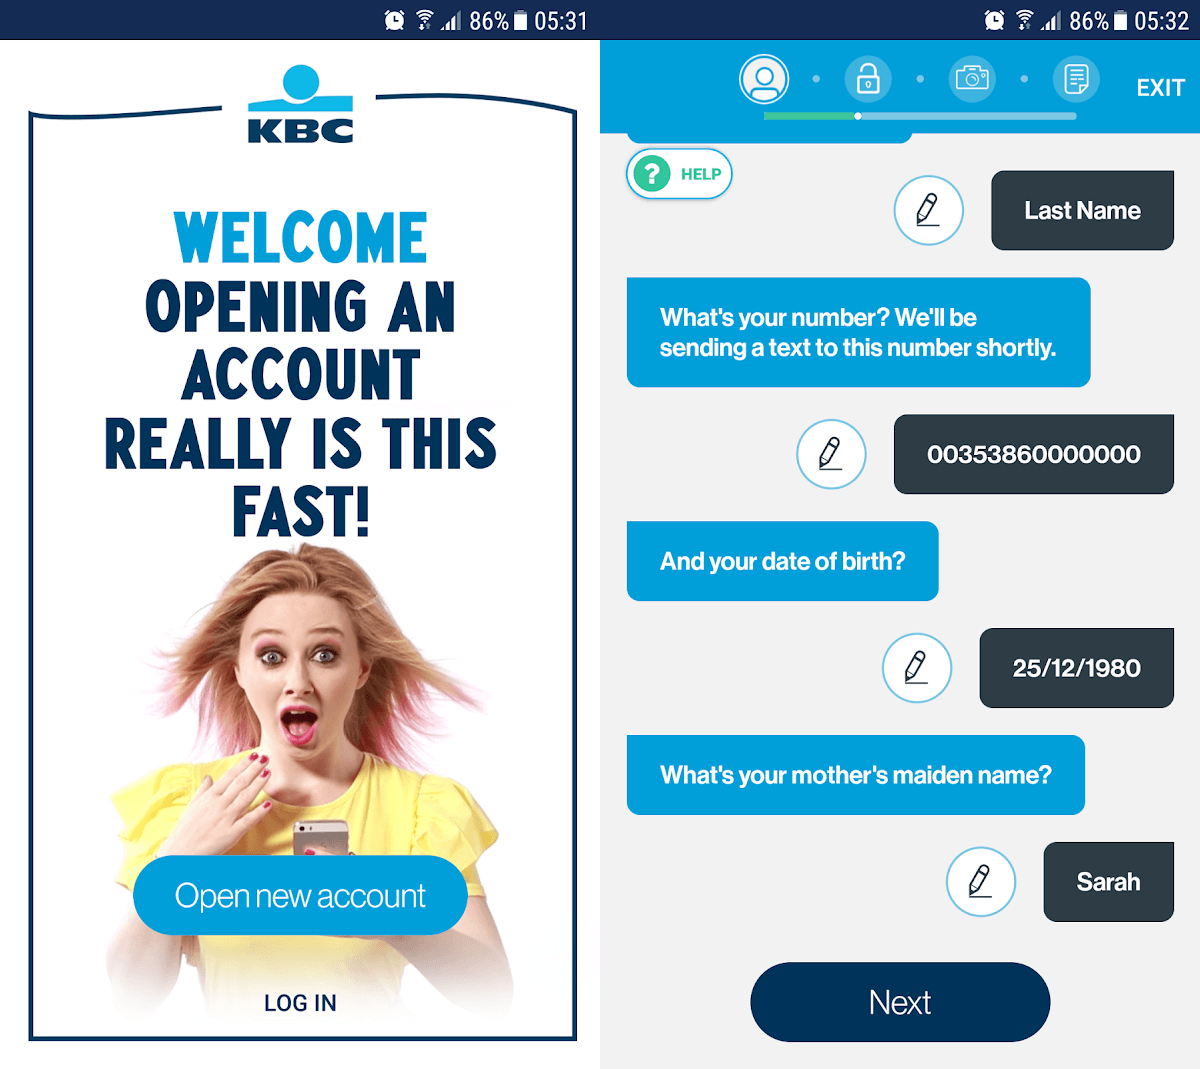
There is no better example of a low engagement screen than a registration form for a new bank account. To ease the experience of entering data into numerous fields and completing the legal checks necessary to open an account, KBC Mobile Banking Ireland has released an app that helps you go through this experience using conversational UI.

KBC Mobile BankingSource: KBC Mobile Banking Ireland mobile app for iOS

Pros

  • All of the benefits of #1 and #2.
  • Better engagement for low engagement areas of your mobile app.

Cons

  • I can’t think of any . Don’t agree? Leave comments below and let’s discuss.

When to Use

Whenever you're seeing high abandonment rates in your forms or little to no engagement in other important areas of your app.

Conversational UI & Xamarin

Integration of conversational UI with mobile apps is a new and interesting area that we are constantly exploring. We’ve recently released a set of Conversational UI controls for Xamarin that enable you to achieve each of the scenarios described in this blog post. Learn more about the controls or download a trial today.

Component Spotlight: Treeview (Part 1)

$
0
0

To display items in a hierarchical, tree-like structure with expandable parent and child nodes, you need a treeview. See how you can easily create and style a custom treeview in Kendo UI.

In a recent component spotlight, you took command of the toolbar. Like the toolbar, this next component is also a unique addition to your supply of tools. The treeview is a component that displays items in a hierarchical, tree-like structure. Each parent node in the tree can be expanded and collapsed to show and hide its child nodes. Child nodes are indented to show the parent they belong to. A treeview is useful when your content has a single root that all other items descend from. It can be used in a code editor to show a project’s file structure or in a browser to list a user’s bookmarks.

Next, you will see how to implement the Kendo UI treeview component.

Creating a Treeview from HTML

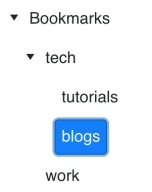
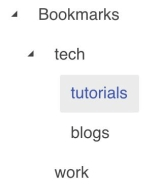
The basic implementation for a treeview can be made from a <ul> element. The first <li> element is the root of the tree. Subtrees are added by placing a <ul> element within a <li> element. Next, you initialize the component by calling $(element).kendoTreeView(). The following are examples of a treeview styled with different themes. The first example uses the Kendo UI theme. The second example uses the Bootstrap theme. And the third example uses the Material theme.

treeview

treeview

treeview

Here is the code to create the example. Enter the dojo to practice.

<!DOCTYPE html>
<html>
  <head>
    <title>Kendo UI Example</title>
    <link rel="stylesheet" type="text/css" href="https://kendo.cdn.telerik.com/2018.1.221/styles/kendo.common.min.css">
    <link rel="stylesheet" type="text/css" href="https://kendo.cdn.telerik.com/2018.1.221/styles/kendo.default-v2.min.css">
    <script src="https://kendo.cdn.telerik.com/2018.1.221/js/jquery.min.js"></script>
    <script src="https://kendo.cdn.telerik.com/2018.1.221/js/kendo.all.min.js"></script>
    <style>
      body { font-family: 'helvetica'; }
    </style>
  </head>
  <body>
    <ul id="tree">
      <li>
        Bookmarks
        <ul>
          <li>
            tech
            <ul>
            <li>tutorials</li>
            <li>blogs</li>
            </ul>
          </li>
          <li>work</li>
        </ul>
      </li>
    </ul>
    <script>
      $(document).ready(function() {
        $('#tree').kendoTreeView();
      });
    </script>
  </body>
</html>

Creating a Treeview from Data

Another way to initialize a treeview is to configure the component's dataSource option. The dataSource takes an array of items. These objects represent the top-most level of the tree. Because our tree has only one node at the top, the dataSource will contain only one object. To add a subtree to a node, an items array is added to the object. The HTML is reduced to a single, empty element. This is the updated code for our treeview:

<ul id="tree"></ul>
<script>
  $(document).ready(function() {
    $('#tree').kendoTreeView({
      dataSource: [
        { text: 'Bookmarks', items: [
          { text: 'tech', items: [
            { text: 'tutorials' },
            { text: 'blogs' }
          ]},
          { text: 'work' }
        ]}
      ]
    });
  });
</script>

Customizing a Treeview with Templates

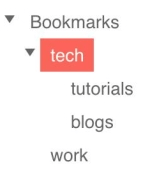
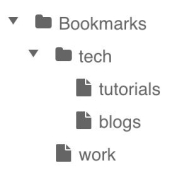
Templates allow you to customize the appearance of items in your treeview. The template can be an HTML element or it can contain properties of the item. You define the template by adding a template field to the treeview’s options. For our bookmark example, we want to put a folder icon next to parent nodes, and a file icon next to leaf nodes. This is what we will recreate:

treeview

If you were going to write out the HTML, the markup would look like this:

<li>
  <span class="fa fa-file"></span>work
</li>

To convert this to a template, we will need to replace the icon class name and the text of the node with variables. To use variables within our template, we will need to use a special syntax. The syntax begins with #= and ends with #. In between is the data. The syntax to get a value from one of the items is item.key where key is replaced with the name of the property. For example, to get the text of an item we use item.text.

In this example, we will add a new property to our items called icon that has the CSS class of our icon font. We will be using the Font Awesome icon fonts, but you could also use another icon font. So that our treeview recognizes our icon proptery, we need to define the sprite field name with the dataSpriteCssClassField option. This is our updated code with the template:

$('#tree').kendoTreeView({
  template: '#= item.text #',
  dataSpriteCssClassField: 'icon',
  dataSource: [
    { text: 'Bookmarks', icon: 'fa fa-folder', items: [
      { text: 'tech', icon:' fa fa-folder', items: [
        { text: 'tutorials', icon: 'fa fa-file' },
        { text: 'blogs', icon: 'fa fa-file' }
      ]},
      { text: 'work', icon: 'fa fa-file' }
    ]}
  ]
});

Conclusion

Treeviews are best used when your content is nested as opposed to flat. Besides the configuration options we went over, the Kendo UI treeview component has many other features. You can rearrange items in the tree by dragging and dropping them, which is certainly applicable to our bookmark example. If your treeview represented a directory, you could make the items draggable and attach an event listener to move the location of the file. Treeview items can also have checkboxes that listen for check events. Since there is much more you can do with treeviews, we will dive deeper into its API. In the next lesson, I will show you how to add and remove items from the treeview.

Want to Try Kendo UI?

Want to start taking advantage of the Kendo UI treeview, or any of the other 70+ ready-made Kendo UI components, like Grid or Scheduler? You can begin a free trial of Kendo UI today and start developing your apps faster.

Start My Kendo UI Trial
Resources

A Look at Vue's Reactive Properties

$
0
0

The Vue JavaScript framework is "reactive," which means it can automatically refresh your data. Learn the ways you can take advantage of this in your apps.

Modern web applications need to render data dynamically in various HTML elements. Various frameworks like jQuery, React, Angular or Vue provide specific mechanisms to address this requirement and simplify the life of a programmer with high level functionality. In particular, the Vue framework provides a Reactive mechanism to display that data, and most importantly, a mechanism to take care of automatically refreshing the UI "when needed".

This raises the question: what is meant by “when needed”? Read on to get an explanation.

How the Vue Reactivity System Works

Vue provides three kinds of properties for rendering data inside HTML elements in a so-called Reactive manner. These are:

  • Properties
  • Computed properties
  • Methods

It’s important to understand how Vue treats each one and particularly how it caches these, as it will have an impact on how often and when the functions will be called.

In this post, we'll review (via a sample) how to use data properties, computed properties and methods, as well as the differences between each one of them in terms of caching.

To follow along, just download this HTML file from Github. This sample is self-contained (It contains both the HTML and the Javascript code as well as references to all required dependencies).

Using a Data Property

The first mechanism to render data in your page is to use a data property.

In the first part of the HTML file we use two properties: startupDate and message.

<div v-bind:title="startupDate">
  A property:
  <span id="id1" style="font-weight: bold;">
    {{ message }}
  </span>
</div>

These are defined when initializing the Vue object with a data object literal like this:

data: {
  message: 'Hello Vue! - This is Vue version: ' + Vue.version,
  startupDate: new Date().toLocaleString()
}

At run-time, the <div> element will be adjusted to replace the two properties with their actual values, producing an output like this:

A property: Hello Vue! - This is Vue version: 2.5.16

At this point you could go to the browser console and enter something like: app.message = "Hi"

The output would then be changed to:

A property: Hi

This is the Reactive nature of Vue: automatically detecting that a property has changed and re-rendering the affected element. This is also called one-way data binding to indicate that the element is bound to the value of a property. It’s bound one way, that is, in the direction of the Vue data towards the span with id="id1". It is not bound in the other direction. For example, if you try to change the content of that span via JavaScript, it won't change the content of the data variable.

You can check this by typing this into your console:

document.getElementById("id1").textContent = "abc"
app.message  // verify message has not changed

Interestingly, you can also bind an HTML element to a data property using JavaScript as long as you do it before the Vue object is created. This is what we do to span id="id2" with this code:

document.getElementById("id2").textContent = "{{ message }}";

Using Computed Properties

The second way to render some data is to use computed properties. You use it exactly like a data property. For example:

<span id="id3" style="font-weight: bold;">{{ computedProp }}</span>

Its definition is different though: the property is defined as a function in the object literal computed of the Vue object. For example:

computed: {
  computedProp: function () {
    // `this` points to the app instance
    return "App startup time: " + this.startupDate +
      " - Execution time: " + new Date().toLocaleString() +
      " - Dependency: " + this.dependency;
  }
}

This produces the following output:

Computed property: App startup time: 5/18/2018, 4:20:42 PM - Execution time: 5/18/2018, 4:20:42 PM - Dependency: I'm dependency property 

The second date and time is computed at function execution time. On initial display, the two dates and times are identical because the Vue object creation time and the rendering happened at about the same time.

What is interesting is that a computed property can be executed again if one of its dependencies has changed. This is exactly what happens when we click on the button "Update Dependency." Now we get some output where the two dates and times are different:

Computed property: App startup time: 5/18/2018, 4:20:42 PM - Execution time: 5/18/2018, 4:34:04 PM - Dependency: New value 1 for dependency property 

Here is what happens:

  1. computedProp is dependent on the data property, dependency
  2. When clicking the update button, an event handler changes the value of property, dependency
  3. Vue detects that the dependency data property has changed, check its list of dependents for this property and finds computedProp is a dependent. As a consequence it executes the computed property again.

Using Methods

The third way to render some data is to output the result of a function call in a method.

A method is defined in the Vue object in the methods object literal. For example:

methods: {
  computedMessageFct: function () {
    return new Date().toLocaleString();
  }
}

We use it like this:

<span id="id4" style="font-weight: bold;">{{ computedMessageFct() }}</span>

Notice the () operator to invoke the function.

When you render the sample page, properties.html, you will notice that span id="id4" gets updated every second. That's weird — we do not make additional calls to this function. Hmm, what's going on?

The reason it is updated every second is that the function computedMessageFct is invoked every time the UI re-renders independently of dependencies. In our case, it's been invoked every second because the clock property is causing a UI update every second. In other words, even though computedMessageFct is not dependent on other properties Vue still considers that <span id="id4"> needs to be refreshed, with the result of calling the function another time.

Conclusion

It's important to be aware that a computed property function can be invoked multiple times, and to pay attention to the side effects or performance implications this may have. Luckily for us, the Vue framework caches the results of these function calls and will only invoke the computed property if one of its dependency has changed.

However, this is not the case for methods used for output to HTML elements. They will be invoked again whenever the UI needs re-rendering. So be careful with the kind of computation you do in these functions. We might think we should just use computed properties then and avoid methods, but one of the advantage of methods compared to computed properties is that we can pass parameters. Once aware of the pros and cons of each type, you can choose the path you need for your applications.

And if you're working with Vue, don't forget to check out Kendo UI for Vue, our UI component library that will help you build beautiful Vue apps fast.

Editor's Note: This post originally appeared on the Progress blog. Check it out for other great content on developing your business apps.

120+ Improvements & New Features in UI for WPF and WinForms in R2 2018 SP1

$
0
0

Enjoy more than 120 improvements plus new features in Telerik UI for WinForms and Telerik UI for WPF in the R2 2018 service pack release.

The latest service pack (for R2 2018) of Telerik UI for WinForms and Telerik UI for WPF is now live! In this update, we have focused our attention on addressing client feedback and resolved 120+ public items (around 60 for each of the suites). While most of these items are improvements, we also managed to add some new features in the controls as I'll describe below.

Let's dive into what's new for UI for WPF/Silverlight and Winforms.

New Features

Telerik UI for WPF/ Silverlight

  • RadDomainDataSource (Silverlight): Introduced the Telerik.Windows.Controls.DomainServices.OpenRia45 assembly, which is built against the latest version of OpenRiaServices.
  • RadVirtualGrid (WPF):Introduced a couple of new methods of the control that will help you achieve even more:
    • GetRowIndexAtMousePosition/GetColumnIndexAtMousePosition - the methods return the row/column index for a given mouse position.
    • CloseFilteringControl - allows you to easily close the FilteringControl if open. (link)
  • RadTreeListView: Added the AutoExpandItemsAfterFilter property, which controls whether the hierarchy items should be expanded after filtering. (link)
  • RadWatermarkTextBox: Auto-opening of the Touch keyboard on Windows 10 with Anniversary update now works out of the box for all input controls that contain WatermarkTextBox.
  • RadPdfViewer: We’ve extended the number of supported PDF document scenarios by handling invalid concatenation of content streams.

Telerik UI for Winforms

  • RadMap:The route request of the Bing map provider now supports ViaWayPoints. This will allow a route to be calculated with intermediate points. For example, making a trip from Seattle to L.A through Las Vegas. (link)ui-for-winforms-radmap

    Another update in the RadMap control is that the TileSize can now be specified when LocalMapProvider is used. In addition, the MapVisualElementFactory is now responsible for the initialization of the tile elements. (link)

  • RadMaskedEditBox:The standard mask provider now exposes a MaskCompleted property, indicating whether all the required input has been entered into the mask.
  • RadChartView: We have added a new LassoSelection controller for easy selection of data points. The selected data points can be retrieved by handling the LassoSelectedPointsChanged event of the controller. (link)ui-for-winforms-radchartview
  • RadBreadCrumb: A new mode allowing a selection in the associated tree directly after clicking an element in the breadcrumb. (link)

Improvements

As I mentioned earlier this Service Pack is filled with improvements, so don't forget to check the full release notes for WPF here and for Winforms here..

Share Your Feedback

Make sure to download and try the latest versions of UI for WPF/Silverlight/Winforms and explore all the new features and themes. They are already available for download in your account.

Are you new to our UI tools? You can download a trial right here.

UI for WPFUI for Silverlight
UI for Winforms

We would love to hear what you think, so please drop a comment below sharing your thoughts. You can also visit our Feedback Portals about UI for WPF/Silverlight, Winforms and Document Processing Libraries and let us know if you have any suggestions or if you need any particular features/controls.

In case you have missed our latest official release (R2 2018), you can find some of the major updates for WPF in my blog post and for Winforms in this blog post.

New Checkbox & Border Controls in Telerik UI for Xamarin R2 2018 SP

$
0
0

Check out the two new components in Telerik UI for Xamarin: RadCheckBox and RadBorder, as well as other improvements to the suite coming with the latest Service Pack.

Last month, with the Telerik R2 2018 release, we shipped Conversational UI, TreeView and BarCode, as well as multiple improvements to the Telerik UI for Xamarin suite. Now, a month later, the Service Pack release is out bringing two more components and numerous new features.

Those of you who have already seen the new RadTreeView may have noticed the 3-state checkbox we use to manage the UI where a parent item might have both checked and unchecked child items. Well, it seems to be a nice control and we decided not to keep it for ourselves, when it could come in handy for you as well.

Introducing the Xamarin CheckBox Control

Now RadCheckBox is a fully-fledged, standalone control, ready to be used in your applications. It comes in two or three states and with commands and theming support.

Checkbox

Easily Add Borders to Items in Your Xamarin Apps

In a similar manner, the Conversational UI features a container with various message types in it. These messages are surrounded by a very flexible border that allows for different corner radii and border widths. So that you can do the same in your apps, we're happy to introduce you to the new RadBorder.

RadBorder comes in handy when you need to make a circle image, add a rounded or rectangular border for a control, or highlight an element with a thicker border. With its simple, yet powerful API (BorderColor, BorderThickness and CornerRadius) you can easily shape your content in the form you need.

Border

Other New Features and Improvements in the Service Pack

This release also features some major performance improvements in RadDataGrid and a number of bug fixes across the suite. For full details on what’s new in 2018 R2 SP1 check out our Release History.

Want to try it out already? Check out the Telerik UI for Xamarin page, or directly download the suite.

Start Your UI for Xamarin Trial

Try the new controls and let us know what you think. Excited for more? See our roadmap and what else we are cooking.

Finally, with the rise of UWP, the decline in Windows Phone 8.0 and Windows Universal was imminent. We have decided to stop supporting Windows Phone 8.0 and Windows Universal 8.1, so that we can focus on delivering value for platforms that really matter – Android and iOS (through UI for Xamarin and NativeScript) and UWP (through our open source UI for UWP).

First Impressions of the TreeView in Telerik UI for Xamarin

$
0
0

One of the reasons the TreeView component (AKA, RadTreeView) was created is to cover the scenarios where a hierarchical data presentation is needed. Of course, this is not the only scenario in which the control can be used, but it is the best fitting one.

The control features the following built-in functionalities:

  • Hierarchical navigation
  • Expand/collapse APIs
  • Commands support
  • CheckBox support
  • DataBinding
  • UI Virtualization
  • Customization capabilities via ItemTemplateSelectors
  • Theming

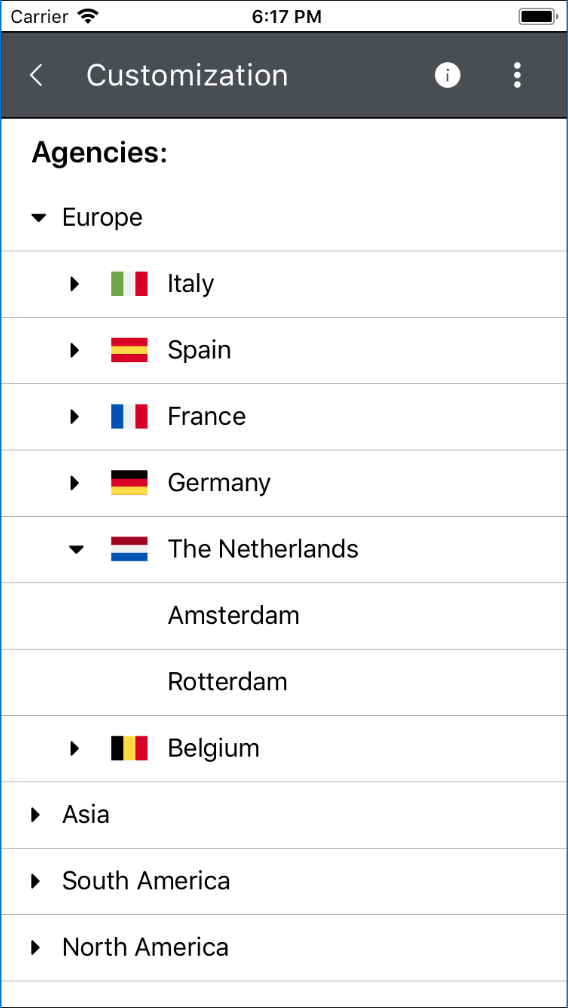
We will take a closer look at the Customization example from our TreeView QSF (quick start framework) and see how the TreeView is configured.

Defining the Scenario

The example shows all cities worldwide in which an organization has at least one office. The cities are grouped by their country, and the countries are grouped by their continent.

Setting up the Data

The two most important steps here are providing the ItemsSource and HierarchyAdapter. In other words, users should provide the raw data that will be visualized and an adapter which can retrieve the children of each data entry. Based on this, the RadTreeView creates the hierarchy. In the example below the ItemsSource is a simple ObservableCollection containing business objects describing a continent.

Without the HiearchyAdapter, the RadTreeView will only display the root level items of the ItemsSource. To properly display the hierarchy, the Telerik.XamarinForms.Common.IHierarchyAdapter interface must be implemented. It has two methods – GetItems() and GetItemAt(). In GetItems(), the adapter should return all children of the item passed as the only parameter. The GetItemAt() should return a specific child of a provided item. For more details you can refer to the source code of the example. Once these steps are made the hierarchical data will be visualized.

Most likely at this point the visualized result will not fit your design requirements. That is because when no ItemTemplate or ItemTemplateSelector is applied, the RadTreeView will render whatever the ToString() method of each business item returns. To beautify the visualization, additional steps should be taken.

Creating Item Templates

Now that the data is set, we can proceed with customizing the look of the items. The RadTreeView allows you to apply a different DataTemplate for each item through a DataTemplateSelector. In the example this is achieved by the ItemTemplateSelector class. The specific implementation can be seen in the GitHub repo. As you can see, in addition to the selecting logic the class exposes several properties of DataTemplate. This allows setting the properties in XAML like so:

<telerikDataControls:RadTreeView.ItemTemplateSelector>
  <local:ItemTemplateSelector>
    <local:ItemTemplateSelector.ContinentTemplate>
      <DataTemplate>
        <!-- ... -->
      </DataTemplate>
    </local:ItemTemplateSelector.ContinentTemplate>
    <local:ItemTemplateSelector.CountryTemplate>
      <DataTemplate>
        <!-- ... -->
      </DataTemplate>
    </local:ItemTemplateSelector.CountryTemplate>
    <local:ItemTemplateSelector.CityTemplate>
      <DataTemplate>
        <!-- ... -->
      </DataTemplate>
    </local:ItemTemplateSelector.CityTemplate>
  </local:ItemTemplateSelector>
</telerikDataControls:RadTreeView.ItemTemplateSelector>

Admiring the Result

In the different <DataTemplate> declarations, you can create the required design for each of the items in the hierarchy. Once this is done you can sit back, relax and enjoy your work.

RadTreeView QSF Customization Demo

Wrapping Up

Now you should be able to properly feed data to the RadTreeView as well as to implement a custom design for the items. As always, more information about the rest of the features of the component can be found in our online documentation. You can also share your feedback and suggestions for the suite through the Feedback Portal.

If this is the first time you are hearing about the Telerik UI for Xamarin suite and want to try it our for your mobile application development, you can do so by going to the website or directly downloading a free trial.

Thanks and happy coding!

Localization and More in Telerik Reporting and Report Server R2 2018 SP

$
0
0

Telerik Reporting and Report Server R2 2018 SP1 brings you localization, UI enhancements and more. Read on to learn what's new.

The first service pack update for the 2018 R2 release of Telerik Reporting and Telerik Report Server is live. This update delivers Report Server localization, Reporting engine stability enhancements, better Azure deployment support and many UI tweaks and improvements.

Report Server

The Report Server Manager web application has been heavily modified in order to support localization out of the box. All string resources used throughout the application are now available in a common file where they are ordered by logical groups and can be easily modified or translated into another language.

rsloc

Another important change has been introduced in the way users are managed. Now users can not only be disabled, but also deleted entirely from the management application.

rsdel

HTML5 Report Viewer

The report viewer template file now uses string resource keys for all of its string resources. These keys can be found in a string resource file where their values can be replaced with custom ones. In addition, such string resource files can be added for a specific culture such as sr.ja-JP.js. When loaded the localized strings from the file will override the default ones.

html5localization

Desktop Report Viewers

The print action initiated by any of the desktop report viewers (Windows Forms, WPF, etc.) has been extended to support bitmap image formats. This improvement enables the desktop report viewers to consume reports from a remote report engine hosted as WebAPI in Azure. Windows Forms viewer now supports rendering in bitmap format, which makes it possible to connect it to an Azure-hosted reporting service.

These viewers also received refinements of their recently introduced Search functionality in the form of small tweaks of the search window. One such change is the ability to apply themes to the search window of the WPF Report Viewer.

search

Eliminated Bugs

For the full list of all the bug fixes, check the release notes for Telerik Reporting and Telerik Report Server

Try it Out and Share Feedback

We want to know what you think—you can download a free trial of Telerik Reporting or Telerik Report Server today and share your thoughts in our Feedback Portal, or right in the comments below.

Start your trial today: Reporting Trial Report Server Trial 

Tried DevCraft?

You can get Reporting and Report Server with Telerik DevCraft. Make sure you’ve downloaded a trial or learn more about DevCraft bundles. DevCraft gives you access to all the toolsets, allowing you to say “no” to ugly apps for the desktop, web, or mobile.

Easier Editing with New Format Painter in UI for WPF and Silverlight

$
0
0

Our Telerik UI for WPF and UI for Silverlight suites have a new feature - the Format Painter. Learn the functionalities and APIs it supports, and how it will help the end-users of your applications to perform in-app image editing.

With the R2 2018 release of our Telerik .NET tooling for WPF and Silverlight, the newest addition to the features of the RadRichTextBox is the Format Painter, which allows the easy transfer of formatting from one place to another in the text. You can see it in action below:

Using Format Painter

How to Use the Format Painter

It's simple to use the Format Painter. Clicking the button once will copy the current formatting under the caret and it will be pasted on the next selection. After this, the format painter is disabled and will not paste further. Double-clicking the button will once again copy the formatting, but it will be pasted as many times as necessary, on each subsequent selection, and the user will have to manually deactivate it.

The Format Painter is smart enough to make subtle changes to the copied formatting when pasting, in order to adapt to the current context. For example, if the selection you are pasting on does not contain an entire paragraph, the properties of a paragraph style may be copied as character properties. For another example, when you copy from a place which has only the normal style, the target text will have its properties cleared, instead of having new ones applied on top of the old ones.

The power users of your rich-text apps may also find the two new associated keyboard shortcuts useful: Ctrl+Shift+C for format copying, and Ctrl+Shift+V for format pasting.

New Format Painter API

If you would like to use the Format Painter programmatically, you can do this most easily using the IDocumentEditor interface, which is implemented by both RadRichTextBox and RadDocumentEditor (for UI and for non-UI related scenarios, respectively). It exposes two self-explanatory methods:

  • CopyFormatting– copies the formatting of the current selection
  • PasteFormatting– pastes the currently copied formatting on the current selection

The upper methods don't affect the state of the UI button. If you would like the button to reflect what you've done programmatically, you can use the ChangeFormatPainterState command, which can be found in RadRichTextbox.Commands. The parameter it expects is of type ChangeFormatPainterStateCommandParameter which can be as follows:

  • CopyForSinglePaste– The format painter copies the current formatting and prepares to paste it once
  • CopyForMultiplePaste– The format painter copies the current formatting and prepares to paste it in multiple places
  • Cancel– The format painter cancels pasting

What the Future Holds

We hope you'll be as happy with the UI and API functionality of the Format Painter as we are. In the next release (R3 2018), we've planned something small but very useful for the RadRichTextBox, the SYMBOL field implementation. It will allow problem-free pasting of text with symbols created in and copied from MS Word. As one of our flagship WPF controls, we are continuously investing in the quality of RadRichTextBox, so expect a ton of fixes and small improvements as well.

And don't forget that our roadmap is heavily dependent on your requirements. Make sure to review the items in the Telerik UI for WPF feedback portal, and cast your votes and/or log your specific requests.

If you are new to Telerik UI for WPF and Silverlight, or this is the first time you are hearing about the suite, you can check out the webpages for WPF and Silverlight, download a trial to try them out for yourself and visit the documentation to get a hang of how they work.

Start your trial today: UI for WPF UI for Silverlight

Thank you and happy coding!

Summer Conference Lineup for .NET Developers

$
0
0

With summer comes longer days, warm air, fireflies... and a great line up of events for .NET developers. Read where you can find us in the summer months and plan to join us!

Not sure about you guys, but I truly love this time of year – summer in the northern hemisphere. Longer days, sunshine, warm air, fireflies... and an awesome lineup of events for us to go to to meet with all of you!

Here's a shortlist of some of the places .NET developers can find us.

Progress Telerik's Summer Lineup of Events for .NET Developers

Developer! Developer! Developer!
June 23 | Reading, UK
DDD (also known as Developer! Developer! Developer! or Developer Day 2018) is a free developer conference hosted at the Microsoft UK headquarters in Reading. Progress is a platinum sponsor of the event. Come by the booth to meet with some of our local team to learn what's new in Telerik and Kendo UI, grab some swag, and enter to win a set of Bose QuietComfort headphones.

Developer Week Germany
June 25 – 28 | Nuremburg, Germany
Progress is a silver sponsor of Developer Week Germany. Stop by the booth to meet with the folks who built our tools. Learn more about the latest in Telerik and Kendo UI, get a sneak peek at some of innovations – like Conversational UI and AR/VR controls, and more. We will have swag to give out and a drawing for Bose QuietComfort headphones.

Microsoft Inspire
July 15 – 19 | Las Vegas, Nevada
Can you say hot?! While we will not have a booth at Inspire, we will have boots on the ground in balmy Las Vegas. We will share from a developer's perspective what we are hearing at the event and share why you might care. We may have some more surprises on the social media front – so stay tuned. And, if you are planning to be at the event, let us know by commenting below!

The Modern Web Tour
July 24 | Berlin, Germany · July 25 | Zurich, Switzerland · July 26 | Munich, Germany
We are joining forces with Microsoft and ".NET Rocks!"'s very own Richard Campbell to host the Modern Web Tour in Berlin, Zurich and Munich. This free event is designed to entertain and educate you about the path ahead for the modern web developer. With speakers like Richard Campbell, Laurent Bugnion, Jessica Engstrom, Christian Weyer, and Sam Basu, you won't want to miss it. Lunch will be served. Knowledge will be imparted. And surprises will occur. It's all free – register today!

Visual Studio Live!
August 13 – 17 | Redmond, Washington
You really can't beat the weather in Redmond in August. Join Sam Basu and Ed Charbenau on the Microsoft campus for Visual Studio Live! As a silver sponsor of the event, you will find at least one of them at the booth at any given time. They can give you a demo of our newest tools, answer product questions, and maybe give you a sneak peek of what's to come in our next release. And, of course they will have swag and a drawing for cool prizes.

We hope to see you at some of these events. If you don't see your favorite summer conference on the list, let us know! We'd love the opportunity to get your feedback on our products, share with you what's new and what is coming and in general, talk tech!

Build Mobile Chatbots and Chat Rooms with Ease in Xamarin

$
0
0

Chatbots are definitely on the rise and people are already exploring various ways to use them for their business and in their applications. However, no matter what you're developing, the UI of your chatbot also needs to be consistent with the overall look & feel of your app. In this article, I will give you an overview of our new Conversational UI for chatbots in Xamarin-based applications, how it works and how to set it up yourself.

At Progress, our mission is to empower developers and boost their productivity. We strive to make straightforward UI components that are powerful and flexible, while following the latest trends in application development. We put a lot of effort into making an API that is easy to use and which also allows you to handle complex scenarios based on your project requirements. A good example of a control that encompasses all of that is the new RadChat for Xamarin.Forms, which shipped with the R2'18 Release of Telerik UI for Xamarin.

Why We Created a Chat UI

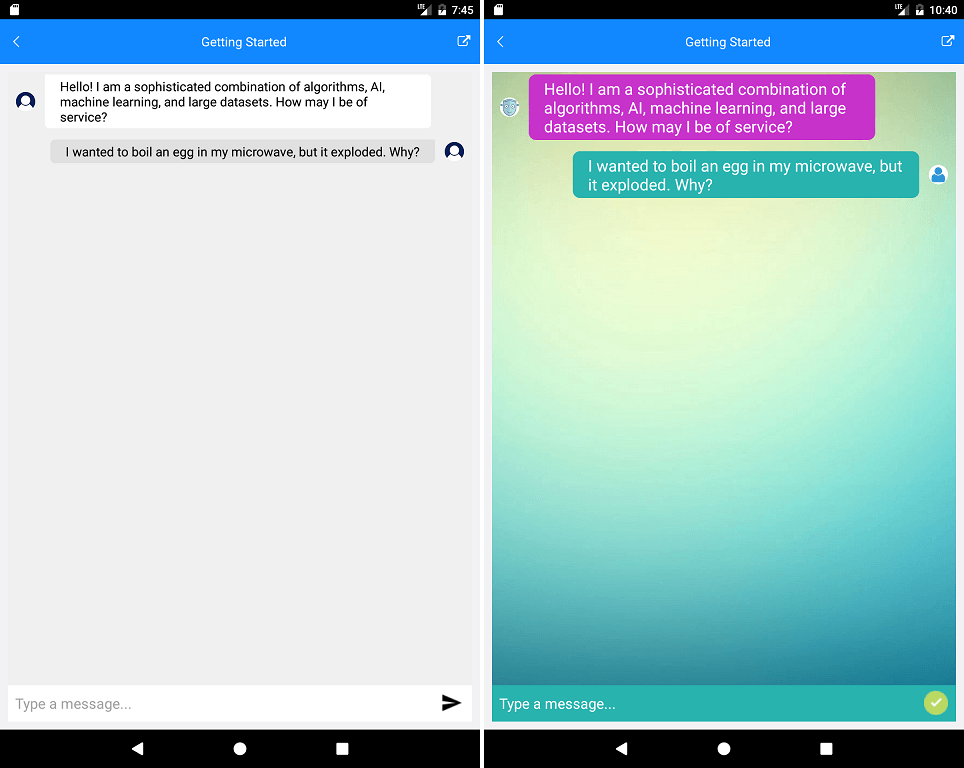
Image of a chatbot conversation.

One of the reasons for creating a chat control is the rise of the chatbots. Chatbots can be very convenient, effective and efficient, and this is why we see more and more apps implementing them today. We created RadChat so that you can build such an app with ease.

While our main focus was bots, we did not forget about chat rooms - you can easily use the RadChat to get a multi-participant chat room up and running as well.

Chatbot Service Compatibility

Before conceiving the RadChat API, we thorough researched the available bot services. As expected, services have different APIs and a service would often have its own notion of conversation flow and data transfer. Needless to say, we insisted on having the ability to support all services, so that you can use a bot of your own choosing.

The previous paragraph may seem a bit abstract, but what it really means is this - we do not have built-in support for any one service, but you can effectively connect it to any service you choose.

This is because RadChat works with a collection of items. These items are the messages that are sent to or received from the bot. You can maintain your own collection and keep it MVVM or simply add these messages to the chat's Items.

You can check out our QSF examples (source code) where Azure and Dialogflow services have been consumed.

Easy to Use

I'm very excited about the new RadChat and in a few seconds, you will see why. Let's put a RadChat somewhere in XAML:

<telerikConversationalUI:RadChat x:Name="chat" />

Now, let's connect this chat with an echo-bot:

public partial class ChatGettingStartedXaml : ContentView
{
  private RepeatBotService botService;
  private Author botAuthor;
 
  public ChatGettingStartedXaml()
  {
    InitializeComponent();

    this.botService = new RepeatBotService();
    this.botService.AttachOnReceiveMessage(this.OnBotMessageReceived);
    this.botAuthor = new Author { Name = "botty"};
    this.chat.SendMessage += this.Chat_SendMessage;
  }

  private void Chat_SendMessage(object sender, System.EventArgs e)
  {
    this.botService.SendToBot((string)this.chat.Message);
  }
 
  private void OnBotMessageReceived(string message)
  {
    Device.BeginInvokeOnMainThread(() =>
    {
      TextMessage textMessage = new TextMessage();
      textMessage.Data = message;
      textMessage.Author = this.botAuthor;
      textMessage.Text = message;
      chat.Items.Add(textMessage);
    });
  }
}

That's it! You have a chatbot UI up and running! A basic bot that just waits a couple of seconds and repeats back what you wrote, but still a fully functional chat UI. Let's take a look at the echo-bot implementation.

public class RepeatBotService
{
  private Action<string> onReceiveMessage;

  internal void AttachOnReceiveMessage(Action<string> onMessageReceived)
  {
    this.onReceiveMessage = onMessageReceived;
  }

  internal void SendToBot(string text)
  {
    Task.Delay(2000).ContinueWith(t => this.onReceiveMessage?.Invoke(text));
  }
}

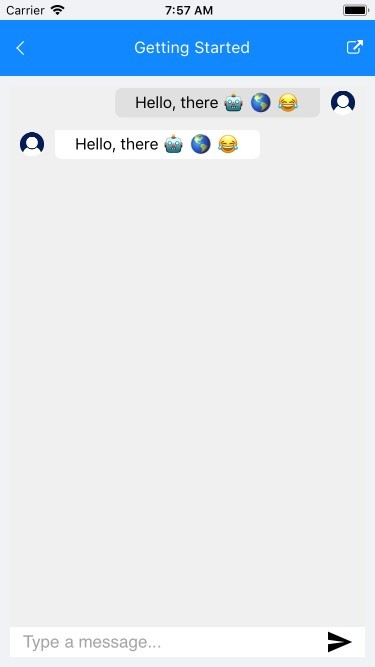
Ok, let's say hi to the bot.

Image of RadChat integration with a simple echo-bot.

Essentially what we did was to put a RadChat on the page and attach a handler for the SendMessage event. This event is raised when the user taps the send-message button, or clicks enter. In the event handler, we need to send the message to the bot. When we receive a message from the bot, we need to add it to the chat Items.

Surely connecting to an actual service will require more attention, and we have created several QSF and SDK examples to showcase some scenarios.

And That's Not All (Other Key Features)

There are many features that will come handy when developing a chat UI.

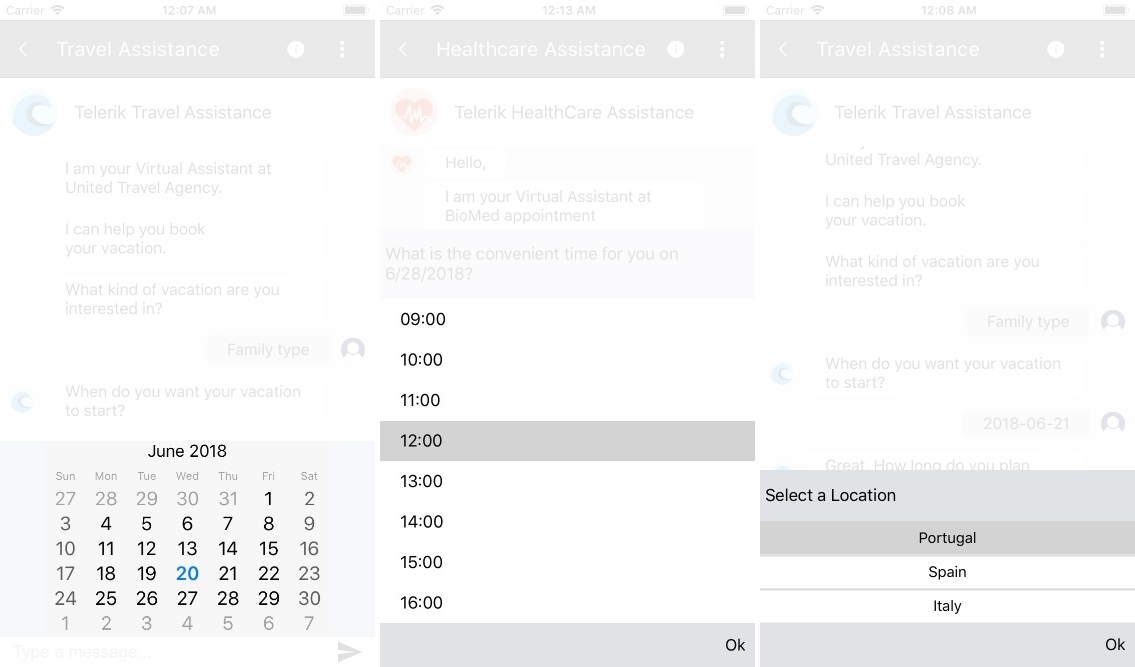
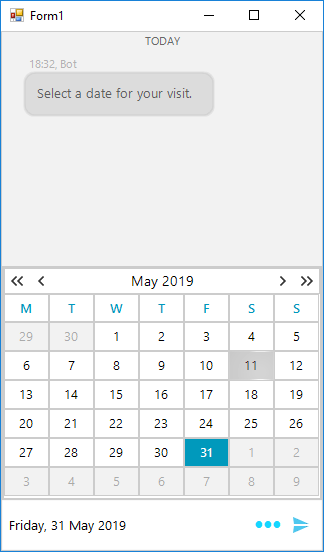
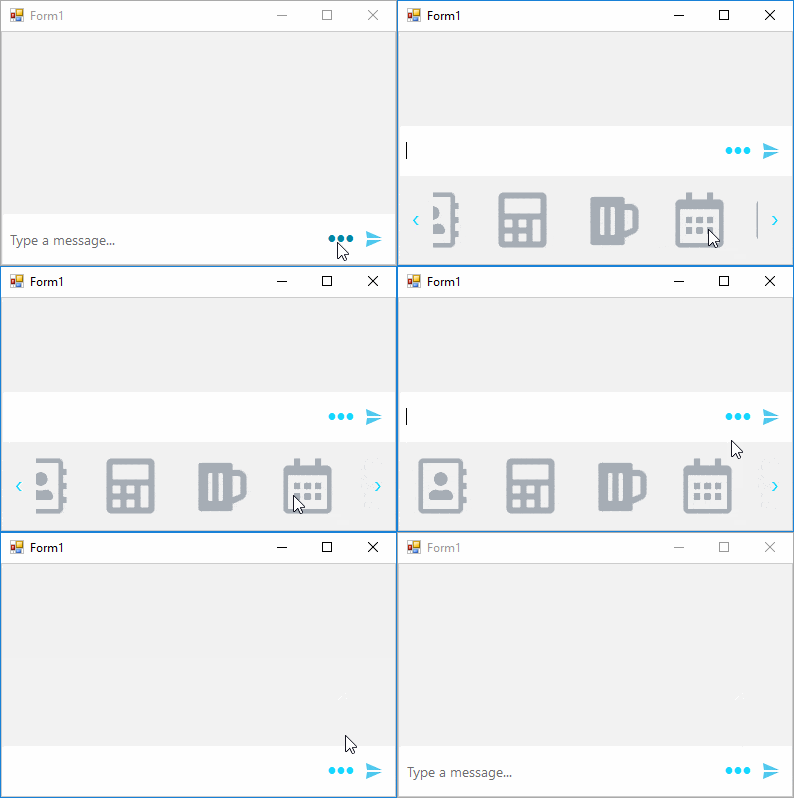
Pickers

A built-in mechanism that allows a choice to be made with a tap, instead of having to write text. We have a few built-in pickers (DatePicker, TimePicker, ItemPicker) and an option to plug-in custom ones.

An image demonstrating some of the RadChat built-in pickers.

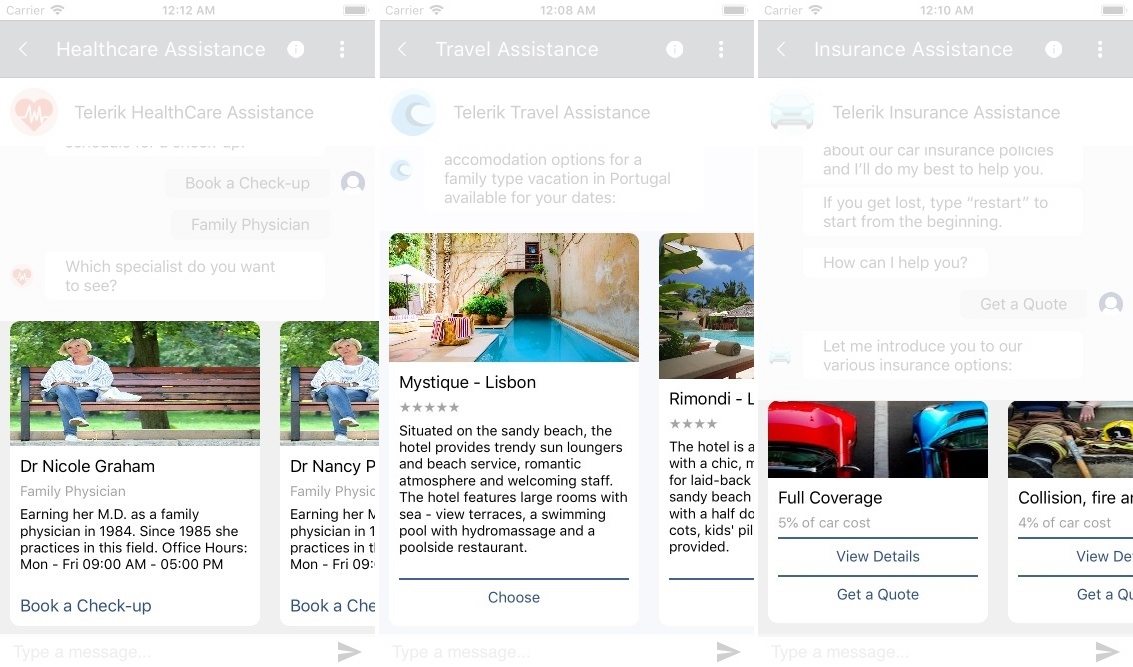
Cards

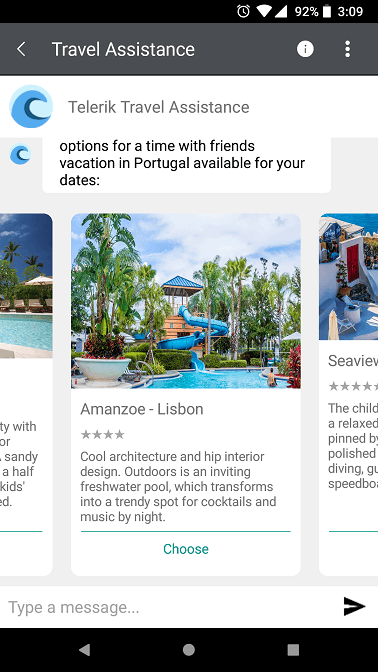
Some pickers have a more complex layout and need to display more information, and require cards. We have a few built-in cards (BasicCard, ImageCard) and an option to plug in custom ones.

An image demonstrating the RadChat cards.

Styling

You can style everything and change the appearance to fit your requirements by using implicit styles, templates, and taking advantage of the Telerik theming mechanism. When necessary you can plug in custom chat item views via a template selector.

An image demonstrating some of the RadChat components styled.

MVVM

You can go full MVVM by utilizing the ItemsSource and ChatItemConverter.

Flexible

You can change much of the default behavior. This includes intercepting the automatic message addition, the auto scrolling to a newly added item, focusing the keyboard and so on.

Try It Out and Let Us Know What You Think

Well, we do not claim to have it all yet. At the moment of writing this blog post, we do not have a typing indicator, or load-on-demand functionality to load old messages, but as we develop the product, we would first love to hear your ideas about how to best enhancing this component. We urge you to let us know what features you need in order to develop your chatbot app in the Feedback portal.

If this is the first time you are hearing about Telerik UI for Xamarin, it's a comprehensive suite of over 70 UI controls and Visual Studio Templates for building native cross-platform mobile applications. You can lear more about the toolkit at our website and take it out for a spin with a free 30-day trial.

Start Your Trial

How to Use a jQuery TreeView UI Component in Your Web App (Part 2)

$
0
0

Take the hierarchical TreeView component further by learning how to programmatically add and delete items and associated actions from a TreeView instance.

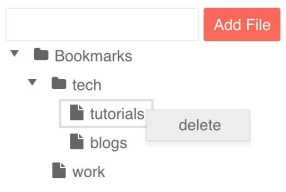
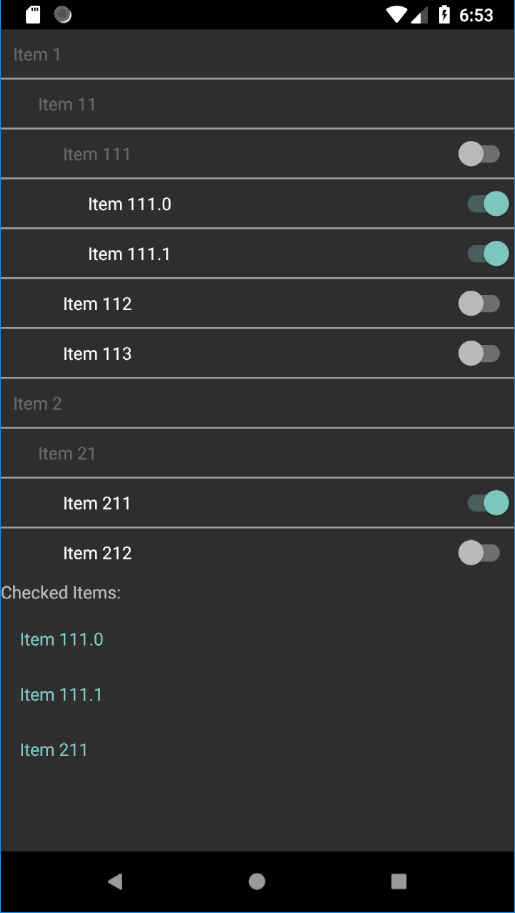
In the the last post covering the TreeView (Part 1), you learned the basics of creating a TreeView component. In today's episode, we will continue building on our bookmark example to practice more advanced skills. Specifically, you will learn how to add and remove bookmark items from the TreeView. Doing so will allow you to explore several of the methods available to the TreeView API. We will also incorporate a couple of the components we have learned about before. This will be the final test to determine if you have mastered control over the Kendo UI navigation components. This is a preview of what we will be building:

Kendo Ui Treeview Component Example

Adding Items to the TreeView

To add items to our bookmark, we will use an input field to enter the text and a button that will append the item to the currently selected folder when clicked. For this example, we will be adding files to folders. Therefore, only nodes that have child items can have additional items added to them. To achieve this we will need to do the following:

  1. Create an instance of the TreeView
  2. Use the TreeView instance to get the selected node
  3. Create a Kendo UI button with a click event listener
  4. Write the function to append the item to the selected node

The first step is to create a TreeView instance and store it in a variable. This will allow us to use the TreeView’s methods for other operations. Add this line after your code for initializing the tree:

const tree = $("#tree").data("kendoTreeView");

In the second step, we will add a select event to the TreeView’s configuration. We will create an event handler onSelect that will update our reference to the currently selected item. This is the code we have so far:

$('#tree').kendoTreeView({
  ...
  select: onSelect 
});

const tree = $("#tree").data("kendoTreeView");
let selected;

function onSelect(e){
  selected = tree.dataItem(e.node);
}

The dataItem method takes an HTML element as a parameter and returns a model of its data. We do this step so that we can access the node’s properties like text and ID.

The third step is to create the button and attach an event handler to it. The markup for the button and input field will be placed above the markup for the tree. The code to initialize the Kendo UI button will go right before the initialization code for your tree. This is the code we will add:

<div>
  <input type="text" id="input" class="k-textbox">
  <button id="button" class="k-primary" >Add Folder</button>
</div>

$('#button').kendoButton({
  click: addNode
});

The last step is to create the addNode function. We can use the append method of the TreeView to add an item to the list of bookmarks. The method requires the data of the new node and the parent node it will be appended to. This is the implementation:

function addNode(){
  if (selected.hasChildren) {
    const value = $('#input').val();
    const node = tree.findByUid(selected.uid);
    tree.append({text: value, icon:'fa fa-file'}, node);
  }
}

We use the method tree.findByUid to convert our model back to a node. This method is one way to find a node in a TreeView. You could also use findByText and pass it the value selected.text.

Removing Items from the TreeView

Next, we will take a different approach to remove a bookmark. When we right-click on an item, we want a menu to appear with a delete option. When delete is selected, it will remove the item. If the item is a folder, it will remove the folder with all of its children. If you recall from a previous lesson, we can create such a menu with the Kendo UI context menu component. These are the steps we will take to add the new functionality:

  1. Create a Kendo UI context menu
  2. Add a select event to the context menu
  3. Create the function to delete a node

First, to create the context menu we have to add the HTML to our page and initialize it with the kendoContextMenu method. This is the markup and code that will be added:

<ul id="context"></ul>

$('#context').kendoContextMenu({
  target: '#tree',
  filter: '.k-item',
  dataSource: [
    { text: 'delete' }
  ],
  select: deleteNode
});

The target option specifies the context. The filter option allows us to target individual nodes in our TreeView. The k-item class is the name used on all of the nodes. When we right-click on one of the nodes, we will be able to identify the specific node through the select event. The select event triggers when you select an item from the context menu.

Last, is the is the implementation for deleteNode:

function deleteNode(e) {
  tree.remove(e.target);
}

Inside of the deleteNode function, we use e.target to identify the node that was right-clicked on. Putting it all together, we have this:

<body>
  <div>
    <input type="text" id="input" class="k-textbox">
    <button id="button" class="k-primary">Add File</button>
  </div>
  <ul id="tree"></ul>
  <ul id="context"></ul>
  <script>
    $(document).ready(function() {
      $('#button').kendoButton({
        click: addNode
      });

      $('#context').kendoContextMenu({
        target:'#tree',
        filter: '.k-item',
        dataSource: [
          {text: 'delete'}
        ],
        select: deleteNode
      });

      $('#tree').kendoTreeView({
        template: '#= item.text #',
        dataSpriteCssClassField: 'icon',
        dataSource: [
          {text: 'Bookmarks', icon:'fa fa-folder', items: [
          {text: 'tech', icon:'fa fa-folder', items: [
              {text: 'tutorials', icon:'fa fa-file'},
              {text: 'blogs', icon:'fa fa-file'}
          ]},
          {text: 'work', icon:'fa fa-file'}
          ]}
        ],
        select: onSelect
      });

      const tree = $("#tree").data("kendoTreeView");
      let selected;

      function onSelect(e){
        console.log(e);
        selected = tree.dataItem(e.node);
        console.log(selected);
      }

      function addNode(){
        if (selected.hasChildren) {
          const value = $('#input').val();
          const node = tree.findByUid(selected.uid);
          tree.append({text: value, icon:'fa fa-file'}, node);
        }
      }

      function deleteNode(e) {
        tree.remove(e.target);
      }
    });
  </script>
</body>

Coming Up - Tooltip, Splitter and Window

If you have come this far, well done. You are ready to graduate to the next level. In the next series of lessons, you will master the tooltip, the splitter, and the window component. The tooltip is a popup that appears near an item when you mouseover or click it. It is a common item you encounter, but the splitter and the window are not so common. This makes them extra special to acquire. The splitter lets you divide your screen into resizable panes. The window component is a modal with the controls of a typical window. With these components and the others to come, you will be equipped to build the next chat app, code sharing site, or whatever else you imagine. The more tools you acquire, the more you will be able to build, so code on!

Try Out the TreeView for Yourself

Want to start taking advantage of the Kendo UI TreeView, or any of the other 70+ ready-made Kendo UI components, like Grid or Scheduler? You can begin a free trial of Kendo UI today and start developing your apps faster.

Start My Kendo UI Trial
Angular, React, and Vue Components

Looking for UI component to support specific frameworks? Check out the TreeView For Angular, TreeView for React , or Treeview for Vue.

Resources


New Features and Fixes We Got with the Latest React Releases

$
0
0

With the newest minor release of React, 16.4, plus a subsequent patch, 16.4.1, we've received lots of fixes, support for Pointer Events, some help with getDerivedStateFromProps(), and a few experimental features. It has been less than two months since we've had the sweet 16.4 release that gave us great updates like the official support of the context API. Instead of living in the past let's look at the new shiny things we get with the latest releases.

Just a reminder, you can always keep in-the-know with the latest releases here in the project repo.

Pointer Events

Probably the "shiniest of the shiny" for the 16.4.0 release was the support for Pointer Events. This was a feature that people requested often to be able to be aware of the following events:

  • onPointerDown
  • onPointerMove
  • onPointerUp
  • onPointerCancel
  • onGotPointerCapture
  • onLostPointerCapture
  • onPointerEnter
  • onPointerLeave
  • onPointerOver
  • onPointerOut

For a long time, we've had access to mouse events to help us understand how a user was interacting with the application. These days, users are interacting with more than a mouse, instead using touch or a stylus, for example. Pointer Events inherit mouse events so we can still take in that information while expanding to different forms of input interaction.

There's a great example for you to play with here at CodeSandbox. In the example there is a circle on the page that listens to the setPointerCapture and other Point Events to move the circle corresponding to the interaction of a pointer. I was able to move it with the mouse/trackpad and with touch in Chrome but when I tried to move it with Pixelbook Pen I received an InvalidPointerId error. Out of curiosity I tried the Surface Pro and its pen, which returned the same InvalidPointerId error in Chrome, but worked just fine in Firefox and Edge.

Here's a little example of the code from the CodeSandbox example where it utilizes Pointer Events:

<div style={boxStyle}>
  <div
    style={circleStyle}
    onPointerDown={this.onDown}
    onPointerMove={this.onMove}
    onPointerUp={this.onUp}
    onPointerCancel={this.onUp}
    onGotPointerCapture={this.onGotCapture}
    onLostPointerCapture={this.onLostCapture}
  />
</div>

Before you get too excited and use this everywhere, the events only work where browsers support Pointer Events specification. According to MDN, right now that's pretty much on all browsers on desktop and mobile except Safari. As I stated above there may also be a problem with using styluses on Chrome as well.

Issues with getDerivedStateFromProps

In working to implement async rendering the React team noticed some cases where the legacy component lifecycle could was encouraging some unsafe coding practices. This was noticed with componentWillMount, componentWillUpdate, and componentWillReceiveProps. After deeming these unsafe and literally adding UNSAFE_ to the old lifecycle names, they brought out a replacement starting with getDerivedStateFromProps.

class Example extends React.Component {
  static getDerivedStateFromProps(props, state) {
    // ...
  }
}

This new lifecycle should handle everything that we once used componentWillReceiveProps for when used with componentDidUpdate. getDerivedStateFromProps is invoked after a component is instantiated and also when it receives new props. Straight from an article by Brian Vaughn,

"It can return an object to update state, or null to indicate that the new props do not require any state updates."

The release of 16.4 included a bugfix for getDerivedStateFromProps that made some existing bugs in React components apparent and more consistent, especially if it your app was using an anti-pattern. The React team has noticed developers getting confused about how to use getDerivedState (and componentWillRecieveProps) and are hoping to push changes and point out cases where they have been misused. They are persistent in reminding developers that the only purpose getDerivedStateFromProps should be used for is to update a component's internal state when there are changes in props. They also want to remind everyone that it should be used sparingly. Brian Vaughn wrote a post on some anti-patterns when using getDerivedStateFromProps and recommended alternate solutions. Before you write out that super long name, I highly recommend reading that article.

List of Fixes from 16.4.0 & 16.4.1

There were lots of fixes in these last two recent minor and patch release. Here is a list of the combined list for your viewing pleasure:

React DOM

  • Fix a crash when the input type changes from some other types to text.
  • Fix a crash in IE11 when restoring focus to an SVG element.
  • Fix a range input not updating in some cases.
  • Fix input validation triggering unnecessarily in Firefox.
  • Fix an incorrect event.target value for the onChange event in IE9.
  • Fix a false positive error when returning an empty <React.Fragment /> from a component.
  • Fix a false positive warning when using react-lifecycles-compat in <StrictMode>.
  • Fix a bug that prevented context propagation in some cases.
  • Fix re-rendering of components using forwardRef() on a deeper setState().
  • Fix some attributes incorrectly getting removed from custom element nodes.
  • Fix context providers to not bail out on children if there's a legacy context provider above.

React DOM Server

  • Fix an incorrect value being provided by new context API.

React Test Render

  • Fix getDerivedStateFromProps() in the shallow renderer to not discard the pending state.
  • Fix the getDerivedStateFromProps() support to match the new React DOM behavior.
  • Fix a testInstance.parent crash when the parent is a fragment or another special node.

React ART

  • Fix reading context provided from the tree managed by React DOM.

To learn more about each of these fixes you can check out their authors and github issues all listed on the React Releases github page.

But Wait, There's More!

Along with that long list of fixes, you also received some other goodies with the past two releases.

React

  • Assign propTypes to components returned by React.ForwardRef.

React Test Renderer

  • Allow multiple root children in test renderer traversal API.
  • forwardRef() components are now discoverable by the test renderer traversal methods.
  • Shallow renderer now ignores setState() updaters that return null or undefined.

React DOM

  • Change internal event names. This can break third-party packages that rely on React internals in unsupported ways.
  • Warn when the forwardRef() render function has propTypes or defaultProps.
  • Improve how forwardRef() and context consumers are displayed in the component stack.
  • Add the ability to specify propTypes on a context provider component.

I hope that something on your wishlist got checked off here. You can always keep asking for the changes you want on React's repo. Fingers crossed! Better yet, feel free to uncross those fingers and use them to make the fixes yourself by following their contribution guide.

Time for Experiments

There was also a new experimental Profiler component for all you React mad scientists out there. This new component allows you to collect new time metrics. When using this component you can have React collect timing information and pass it to the onRender function. For now, most of the functionality for this new component is hidden behind the enableProfileModeMetrics flag. When the flag is disabled the component will render its children normally. Here's a little snippet of code from Brian Vaughn's PR:

const Profiler = React.unstable_Profiler;

render(
  {/* Components not measured... */}
  <Profiler id="some identifier" onRender={loggingFunction}>
    {/* Components to be measured... */}
  </Profiler>
  {/* Components not measured... */}
);

Keep Up

You can check out all the details, commits and more for all the latest React release information on their repo. It's easy to tell the React team has been busy and are showing no signs of slowing. This is one of the reasons the Kendo UI team has rolling releases to make sure we keep up-to-date to help you build your React apps faster. Hope you're getting all the React features and fixes you were hoping for — stay on top of the latest bits by downloading the free trial or logging into your account if you have one!

Until the next release, Happy Coding!

More Online Purchases in 2018: Is Your App Ready?

$
0
0

Are your apps ready to grow in 2018? Check out the latest ecommerce trends and why developers should care.

If your apps and websites involve people buying things, brace yourself for continued growth. As developers, we're often so far ahead of the curve it's easy to lose perspective on what's happening in the real world. But while ecommerce is an everyday thing for us, it's continuing to grow in the US. We'll talk about what that means in a moment.

Every quarter, the online measurement company Comscore releases its metrics of the US ecommerce business. Even if you're not working on ecommerce projects or at an ecommerce company, we've found some insights every developer can glean from the latest report. (2018 State of the US Online Retail Economy)

Hasn't everyone pretty much shifted to buying things online? Well, while in our developer space it seems that way, in the real world they have not. The Comscore stats tell us that about 1 in 5 transactions are now made online, which is still a lot.

For us, the key numbers are these: comparing any quarter in 2018 to the same quarter in 2017, we can expect the number of ecommerce transactions in the US to grow about 20%. That shows an increase even over the preceding 2016-2017 growth. It is easy for us to think that the US is a pretty mature market for online spending, but, while that's true, there's still plenty of growth.

So are your apps ready to handle an additional 20% in the second half of 2018 and heading into the busy fall and winter seasons? (Comscore says Q4 and Q1 are traditionally highest simply due to weather - people don't like to leave the house when it's cold.)

As developers, there's never a better time to refactor, and choose the highest performing tools and components. If more and more people are making more and more transactions online, our apps and sites should have exceptional UIs in style, usability and performance. Telerik DevCraft was designed to make it easy for developers to build beautiful and high-performing apps faster. If you don't have a DevCraft license, make sure to download a free 30-day trial.

Building a WinForms Chatbot: Key Features of the RadChat Control

$
0
0

The Chat control in Telerik UI for WinForms (a.k.a. RadChat) can handle messages, cards, suggested actions, time and/or date picking and so much more. In this blog we look at what RadChat has to offer and how it can help your users interact more easily with your chatbot.

The purpose of the new Conversational UI (RadChat) control in Telerik UI for WinForms is to make it easier for you to build chatbots and embed them in your applications using the various bot services out there, such as Azure Bot Service, Google’s DialogFlow, Amazon Lex, etc. The component is also applicable if you plan to create peer-to-peer chats.

The obvious thing here is that RadChat can show messages and can take text input from the user and send it to you, the developer. This is the absolute bare minimum for a chat client - text-in and text-out. However, we are now in the age where most chat clients should do so much more than simple text exchanges.

Suggested Actions

Let’s dive directly into what RadChat offers by looking at suggested actions. Leaving the user with an open question can lead the conversation in a direction your chatbot is not prepared to handle. Humans react and behave unexpectedly, and the best thing you can do is give the client choices instead of leaving the answer to their imagination. Here is a question a bot might ask the user complimented by a set of prebuilt replies they can choose from.

this.chat.AddMessage(new ChatTextMessage("Please, select the type of service you want!", bot, DateTime.Now));
 
List<SuggestedActionDataItem> suggestedActions = new List<SuggestedActionDataItem>()
{
  new SuggestedActionDataItem("Hair cut"),
  new SuggestedActionDataItem("Shave"),
  new SuggestedActionDataItem("Both")
};
 
this.chat.AddMessage(new ChatSuggestedActionsMessage(suggestedActions, this.bot, DateTime.Now));

Suggested actions

This has several other benefits in addition to navigating the client through the conversation. There are no typos, and there is no need for validation or autocorrection to account for all sorts of common human errors. When the user clicks on an action you get the value you have set, which uniquely identifies this action, and you can know for certain where the conversation is going.

Cards

The next feature we will look at is cards. There is a saying that "a picture is worth a thousand words." Well, in that case a card says more than a thousand words as cards usually have both an image and description text. If you need to show graphical and/or structured information, cards are a great tool for that. There are several popular card formats that we have prebuilt card layouts for. These are a product card, a flight card, a weather card and an image card. Here is an example of how you can quickly say more than a thousand words:

this.chat.AddMessage(new ChatTextMessage("Here is your flight itinerary:", bot, DateTime.Now));
 
List<FlightInfo> flights = new List<FlightInfo>()
{
  new FlightInfo("Los angelis", "LAX", DateTime.Now.AddMonths(3), "Tokyo", "HND",DateTime.Now.AddMonths(3).AddHours(11.55)),
  new FlightInfo("Tokyo", "HND", DateTime.Now.AddMonths(3).AddDays(7), "Los angelis", "LAX",DateTime.Now.AddMonths(3).AddDays(7).AddHours(10.05))
};
 
ChatFlightCardDataItem card = new ChatFlightCardDataItem("Steven Holmes", flights, Properties.Resources.Plane, "$430", null);
 
this.chat.AddMessage(new ChatCardMessage(card, bot, DateTime.Now));

Flight card

Of course, all cards are highly customizable, and you can also create your own cards if you need something different.

You can also group identical or different cards into a carousel which the user can scroll through, and then select or perform an action on the card or cards of their choice.

Overlays

Overlays are UI elements that overlay the chat interface and require some user interaction. The built-in overlays currently allow the user to choose from a list, to select a date from a calendar or to choose date and time from a calendar and a time picker. These again give you the ability to guide the user in the conversation by, for example, allowing them to choose only specific dates or to restrict his time choice to working hours only.

this.chat.AddMessage(new ChatTextMessage("Select a date for your visit.", bot, DateTime.Now));
 
ChatCalendarOverlay overlay = new ChatCalendarOverlay("Select a date for your visit.");
overlay.Calendar.RangeMinDate = DateTime.Now.AddDays(1);
 
this.chat.AddMessage(new ChatOverlayMessage(overlay, true, bot, DateTime.Now));

Overlay

Toolbar

The control also features a built-in toolbar, where you can add toolbar actions to aid the user by performing automated tasks or anything you might fancy.

Toolbar actions

Conclusion and Next Steps

I hope you found this run through of the features of the RadChat control in Telerik UI for WinForms useful. Let me also add that, all features of the control are highly customizable, and you even have the ability to add your own type of elements by extending the base classes. Of course, as with all our controls, full support for our themes is also in place.

In conclusion, we hope our our Conversational UI offering will help you when you need to build a chatbot or a P2P chat in your WinForms desktop apps. The control is part of the Telerik UI for WinForms suite, which you can learn more about via the product page and comes with a 30-day free trial giving you some time to explore the toolkit and consider using it for your current or upcoming WinForms development.

Want to give it a try? Start Your Trial Today

Thanks and please let me know if you have any questions or comments in the section below.

Join Progress, Microsoft and .NET Rocks! on the Modern Web Tour in Central Europe

$
0
0

There's no better time to be a web developer. Join us on the Modern Web Tour to have some fun and learn the past, present and future of web development.

This July, the Progress Telerik team, Microsoft, and .NET Rocks!'s very own Richard Campbell are hitting the road for the Modern Web Tour—a free event designed to entertain and educate you about the path ahead for the modern web developer.

To understand the present and the future, you need to understand the past, and Richard Campbell is just the storyteller to do that.He will kick off each event with a history of the web. If you haven’t heard him speak, you are in for a real treat.

Then our very own Sam Basu will talk about “Modern Web Development with Polished UI.” He’ll review the web development options—WebForms, MVC, Razor, .NET Core paired with JavaScript—and walk you through the polished performant UI tools available from Progress, like our Telerik and Kendo UI products. Word has it, he may also provide insight into what our product teams are working on for the modern web.

Laurent Bugnion from Microsoft and Microsoft Regional Director Christian Weyer will follow Sam. They will cover ASP.NET Core & Azure—and maybe even give you a sneak peek at Blazor, Ooui and Uno.

We'll end each day with a live .NET Rocks! show with a different special guest in each city, including the likes of Jessica Engstrom.

We will make three stops on the tour:

Berlin, Germany | Tuesday, July 24
Microsoft Atrium
Charlottenstraße 46
10117 Berlin

Zurich, Switzerland | Wednesday July 25
Microsoft Switzerland
Richtistrasse 3
8304 Wallisellen

Munich, Germany | Thursday, July 26
Microsoft Germany
Walter-Gropius-Straße 5
80807 München

Each event will run from 9:30 a.m. til 2:30 p.m.

Lunch will be served. Knowledge will be imparted. Surprises will most definitely occur. 

It's all free. And in person. But seating is limited so register today.

Oh! We are exploring the idea of bringing the Modern Web Tour to other cities around the world. If you want us to add your hometown as a tour stop, let me know! Leave me a comment below or tweet the city of your choice using the hashtag #heyTelerik.

Deep Dive into the World's First TreeView Control for Xamarin

$
0
0

This blog post is a continuation of my initial publication on the release of the TreeView control in Telerik UI for Xamarin. Below, I will go over how to get started with the TreeView control, defining the requirements and seeing the results. I hope that this will give you a deep dive into the control, so that you can start using it for your mobile application development.

Getting Started

Two important requirements for visualizing hierarchy are the ItemsSource and HierarchyAdapter. Based on what is provided for these, every business object gets indexed and a dedicated context is created. The context is a class which contains meta information describing the hierarchy. It also optimizes and simplifies operations like adding, removing, expanding and collapsing items.

After creating all contexts, the layout of the RadTreeView uses them instead of the business items. Each context is of type TreeViewDataItem and is set as the BindingContext of the respective visual representation of the business item, and exposes the following properties:

  • Item: object, contains the business object
  • Header: string, contains the text extracted from the property set as DisplayMemberPath
  • Level: uint, describes how deep in the hierarchy the item is
  • IsExpanded: bool, true if the children of the item are visible, otherwise false
  • IsChecked: nullablebool, true if the checkbox of the item is checked, false if it is unchecked, null if the children are both checked and unchecked
  • IsLeaf: bool, true if the item has no children, otherwise false

This metadata can be utilized when a custom ItemTemplate is used. With the help of triggers and/or converters, you can dynamically modify the DataTemplate.

Explaining the Default Template

The default ItemTemplate of the RadTreeView also uses this approach to achieve the hierarchical look and feel. The indentation on the different levels is just left Margin applied to the Label visualizing the Header. The expand/collapse indicator is another Label whose Text is changed depending on the IsExpanded and IsLeaf properties. And lastly a RadCheckBox is bound to the IsChecked in TwoWay mode to keep the UI synced with the actual status of the item and vice versa.

Defining Requirements and Actions

I will create a custom ItemTemplate to cover the requirements:

  • Items with and without children should have different TextColor
  • All items, except levels 0 and 1, should visualize right-aligned Switch instead RadCheckBox
  • The Switch should serve for checking the item

Here is how I will cover the requirements:

  • Keeping in mind that all leafs of a tree structure have no children, I will use the IsLeaf flag of the context to differentiate between the items with and without children.
  • To understand if the Switch should be visualized I will use the Level property.
  • I will bind in TwoWay mode the IsToggled property of the Switch to the IsChecked property of the context. To test if the checking functionality works, I will print the content of the CheckedItems collection of the RadTreeView. This is a collection containing all checked items.

Presenting the Solution

The following DataTemplate covers all requirements:

<DataTemplate>
  <Grid Margin="{Binding Level, Converter={StaticResource levelToMarginConverter}}"
        HeightRequest="40">
    <Grid.ColumnDefinitions>
      <ColumnDefinition />
      <ColumnDefinition />
    </Grid.ColumnDefinitions>
    <Label Text="{Binding Header}"
           VerticalOptions="Center"
           VerticalTextAlignment="Center"
           TextColor="{Binding IsLeaf, Converter={StaticResource isLeafToColorConverter}}" />
    <Switch Grid.Column="1"
            HorizontalOptions="End"
            VerticalOptions="Center"
            IsToggled="{Binding IsChecked, Mode=TwoWay}"
            IsVisible="{Binding Level, Converter={StaticResource levelToVisibilityConverter}}" />
  </Grid>
</DataTemplate>

Here is how it looks like with a simple ItemsSource:

Utilizing TreeViewDataItem

Wrapping Up

Now you should be know how to leverage the full potential of the underlying TreeViewDataItem object. More information about the specific implementation can be found in the small application I created especially for this demo.

In conclusion, we would love to hear what you think about the TreeView control and how we can continue to improve it. It's part of the Telerik UI for Xamarin suite, which you can learn more about at the product page, or download a free 30-day trial and play around with the available 70+ Xamarin controls and Visual Studio Templates.

You can always check out to the detailed documentation for more developer examples, and we we always welcome you to help or share your feedback through our feedback portal.

Thank you and I can't wait to see all the great mobile apps you are going to create!

Viewing all 4183 articles
Browse latest View live


<script src="https://jsc.adskeeper.com/r/s/rssing.com.1596347.js" async> </script>